a finished project and a new one

Hello everyone! I hope you’re all staying cool this summer (if it’s summer where you are) — the temperatures here are in the 100s and I’m staying inside as much as possible.

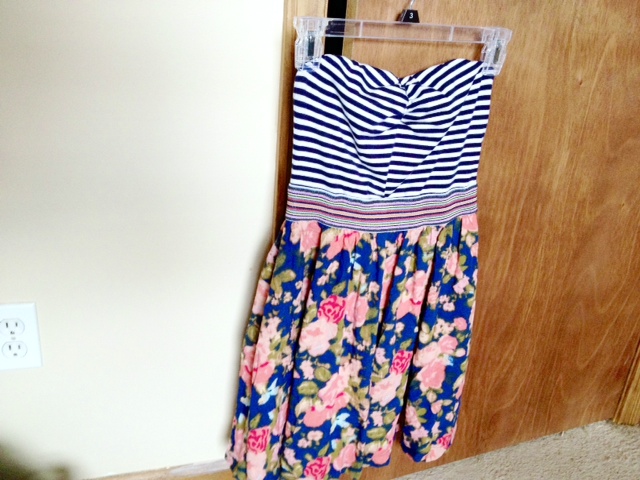
In an effort to be more comfortable in the heat, I made a new linen shift using the historical method that includes only squares and triangles. I used this method on my brown one last year, but this one is entirely machine sewn to save time and I also gave this one short sleeves instead of long ones.

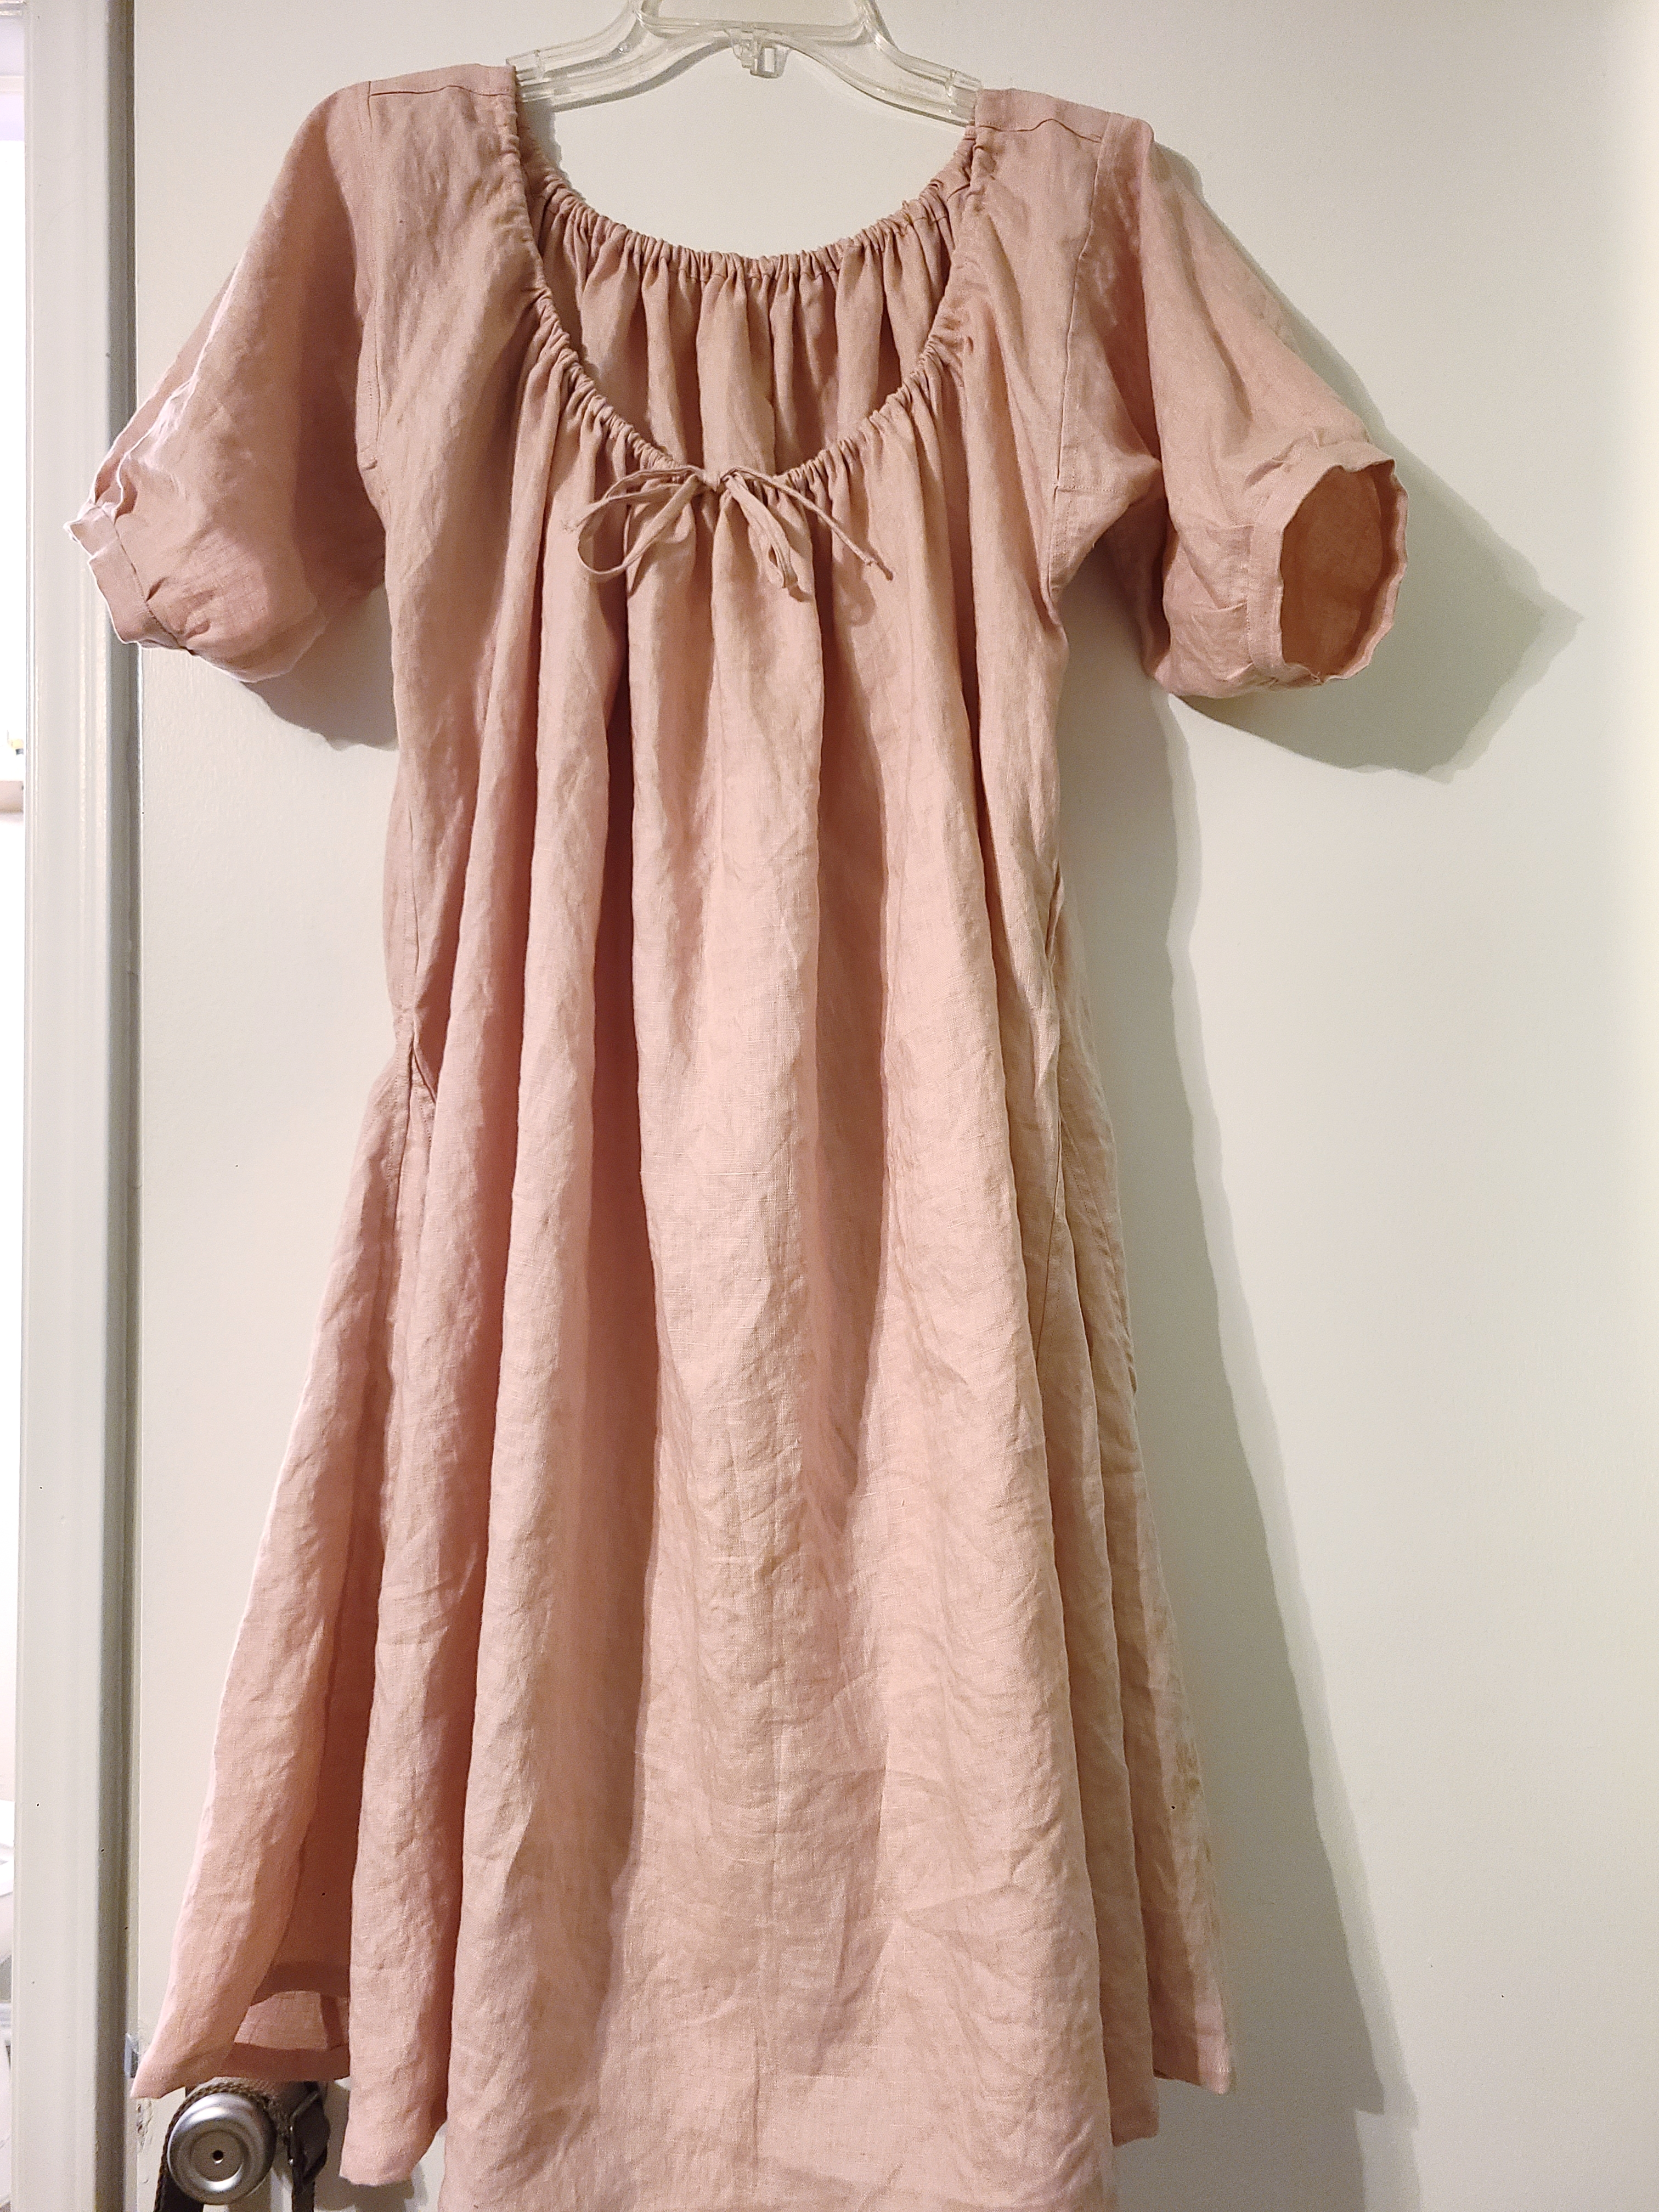
It hits just above my knees and is pretty comfy. I may use it as part of a ren faire costume if I decide to do something other than the swamp witch this year, although I think I may just do the same thing as last year and maybe just make a better skirt.

Anyway, I’m also in a redecorating mood, and I’ve recently bought some new household items to fit the dark cottagecore theme I’m going for in my bedroom (think lots of dark greens and teals and browns, with a few lighter accents here and there). It’s a good theme for me because I’ve already got a ton of old dark wood furniture, and I like the cozy, sleepy atmosphere.

I decided I need a new throw blanket for the bed, though, and I already have a ton of Paintbox Yarns Simply Aran in the shade Vintage Pink so I decided to use that for a crocheted blanket (yes, it matches the shift, and that was completely unintentional but kinda cool). I think it’s a good accent color with everything else, and I chose the Fenya Blanket pattern to use. It costs money and is very similar to the free Popcorn Blanket pattern, but I was willing to pay the small price to get the chart, which I often find easier to follow than patterns that are written out. Here’s my first square:

It’s only got 11 rounds but it’s larger than I expected it to be. Not that I’m complaining — that means fewer ends to weave in and fewer squares to connect at the end! I do wish the yarn wasn’t completely acrylic because acrylic blankets make me sweat at night, but I’m probably just gonna keep this at the foot of the bed for decor, and because of that I might not even need to make the recommended 16 squares — I bet I can get away with a smaller size blanket just fine.

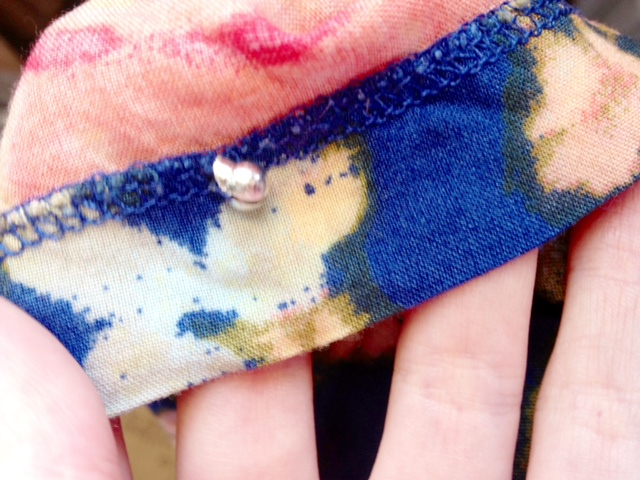
I’m also working on sewing a cute linen summer dress with a strawberry and floral print, but I’m incredibly frustrated with it at the moment — I picked my size so carefully and even combined areas from 2 sizes to make it fit me perfectly, and the whole thing turned out too big. I’ve got to undo a ton of work and trim some of the pieces, but I’m worried it’ll look weird so I’m just kinda staring at the half-finished dress sitting on my sewing machine, not wanting to mess with it. I need to finish it though — the fabric was ridiculously expensive.

Sorry if this was a kind of boring post — I just wanted to share my projects and there’s not really anything else going on in my life to talk about right now. I hope you’re all doing well and staying safe and healthy, and I’ll try and come back soon with something more interesting!

free pattern: not your granny’s granny square clutch!

not your granny's granny square clutch

The clutch I made is complete and I’ve written down the pattern and typed it all up for anyone who’s interested (for free, of course)!

FullSizeRender 2

It utilizes the flower stitch sampler granny square I made recently (4 of them, stitched together in a special way) and pairs them with a fabric lining and a 7″ zipper.  A sewing machine is nice but isn’t absolutely required.  The clutch holds a checkbook or an iPhone 6 in a case.

FullSizeRender 24

If you’re interested in finding out more, like the specifications, click here.

If you’re ready to download the free pattern in PDF form, click here!

If you have any questions, comments, or suggestions, feel free to leave them in the comment box below or contact me using the contact form in the menu bar.  There will be even more awesome patterns coming up soon (I’m starting to get on a roll with this pattern thing!) so stay tuned!

I hope you all have the happiest of Holidays, wherever you are, and stay safe if you’re traveling!  See you soon!

sewing scissors acquisition

My parents and I went to one of my favorite antique malls yesterday up in Charlotte, NC. They got me a fantastic vintage 9″ pink Pyrex pie plate and also some [presumably] vintage sewing scissors!

20140726-213716-77836967.jpg

I don’t know exactly how old they are but they look awesome and they’re REALLY sharp.

Something about having pretty crochet/knitting tools just makes the whole process just a tad more indulgent (kind of like a really expensive and luxurious skein of yarn), don’t you think?

What are some of your special tools? Have any antique hooks or needles, or maybe a really cool measuring tape? Let me know in the comments, and as always, thanks for stopping by!

sewing and a belated link

Hey everyone!  I have a bit of a different post for you today.  I’ve been doing some sewing and wanted to share it with you.

As you can guess, working on a food truck is very hot.  Working outside the food truck for hours in the sun is also very hot.  Appropriate attire is a bit tough to figure out — if you wear a shirt you’ll need an undershirt to keep your sweat from showing through, which works but also makes you a bit hotter.  Dresses are ideal for standing outside (inside the truck you need to stick with the shirts), but there is the problem of wind.  I was nearly discommoded by a strong breeze a couple of weeks ago, but I caught the skirt before it flew up.  Here’s the dress, which as you can see is a bit short, meaning the problem is likely to happen often:

sewing dress

That close call reminded me of something I’d heard a long time ago about sewing things into the hem of a dress to weigh it down just a bit and keep it from blowing up.  The best options I could think of were cheap chain necklaces or small fishing weights.  The fishing weights were really cheap, so I went with those:

sewing weights

They actually don’t weigh very much (although heavier options are available), but since the fabric is so thin I didn’t want to weigh it down too much and make it look weird.  I went to my handy dandy sewing box, which my mom used to use:

sewing box

Using navy thread, I hand-sewed a fishing weight every 5 inches along the hem of the dress:

sewing done

Testing it out today revealed that the fishing weights do indeed help with breezes, but are still not effective against stronger gusts of wind.  I’m debating on getting another pack (they’re only about $1.50) and sewing more in.  It took such a long time though, working with such tiny things and making sure that they were securely attached, that I’m not up to doing more right now.

The second thing I wanted to mention today is a bit belated.  Over a week ago, Rachel from The Little Room of Rachell made a guest post on another blog about how to crochet if you are left-handed.  Being right handed myself, I never really thought of how troublesome it would be to try to learn as a leftie from right-handed instructions (which pretty much everything is), but now I see that it would definitely be nice to have some instruction.  I just wanted to link to her post so you can see it, if you haven’t already.  The post is on the blog Slugs on the Refrigerator; click here for the post!  I had actually never seen that blog before, so I subscribed immediately — it looks great!

That’s all for today, thanks for stopping by!  The next CAL post is already scheduled, so get ready for Saturday!

something new, and I’m selling

Check it out, it’s my first quilt ever!

It’s a rather shabby chic style that I was dying to try, and I think it turned out well.  OK so my binding isn’t exactly wrinkle-free, but actually I think it adds to the kinda shabby look.  It’s a baby quilt, and it’s about 27″ x 27″ (or about 69cm square), so it’s not very big, but since it was my first one I wanted to make sure I could do it before making a larger size.

And here’s the machine I used.  A 1949 Singer, whose claim to fame was the fact that it was electric and that it has a backstitch option.  Very advanced, I know.  I actually really love this machine, but after making a quilt on it I feel like it would be easier to sew quilts on a newer machine.  That’s out of my budget right now though, so I’ll keep using this baby!

The white fabric is flannel, the thread is cotton, and the squares are, I believe, all cotton as well.  The batting (1″ loft and very plush) is polyester.  The picture above was before I washed it.  The raw edges of the squares are a little more unraveled after being washed, which was the point for me (that’s what I loved about this particular way of quilting).

There it is washed (sorry for the bad lighting).  You can see the edges are a little frayed.  I love it.

And there’s the finished/washed product again.  I’m really proud of it, even though it’s small.

The reason I made this is because I’m thinking of making baby quilts to sell.  Would anybody be interested in a custom baby quilt?  I could make any color combo desired, and I could make any future quilts over 30″ square ( a little bigger than this one).  We could negotiate a price depending on what materials you want.  After some practice making baby quilts I would love to try larger sizes, but that may be a while.

Actually, I’m willing to sell this one.  For it to be worth what I paid for the materials plus shipping, I’m asking $60.  Any takers?  It would also look pretty in a crib, on the back of a recliner, on a wall, in the car, or as a play mat.  Machine washable and dryable.  This is cheaper than many others that you may find online because it is my first one and I’m still getting used to the technique and the machine.  If anybody wants it, please comment on this post to claim it and e-mail me your address at HannahDavis1988@gmail.com.  Thanks for visiting today!