as-we-go stripey blanket crochet-a-long 2 year anniversary!

It’s been 2 years since we started the As-We-Go Stripey Blanket Crochet-A-Long!  Doesn’t seem like that long to me!

as we go stripey blanketClick the link above to be taken to the free pattern, where you can view it online or download it as a PDF (there’s a photo tutorial version and also a shorter version for printing)!

And I owe a huge thanks to everyone who’s made the blanket (I was really surprised by the number of blankets out there, and definitely honored!) as well as to Julie, the author of the blog Little Woolie, for the pattern inspiration!  Check out her blog for so much lovely stuff!

Thanks so much for stopping by!  Feel free to browse around to see the crochet and knitting tutorials and patterns available here on Not Your Average Crochet — everything’s in the drop-down menu!

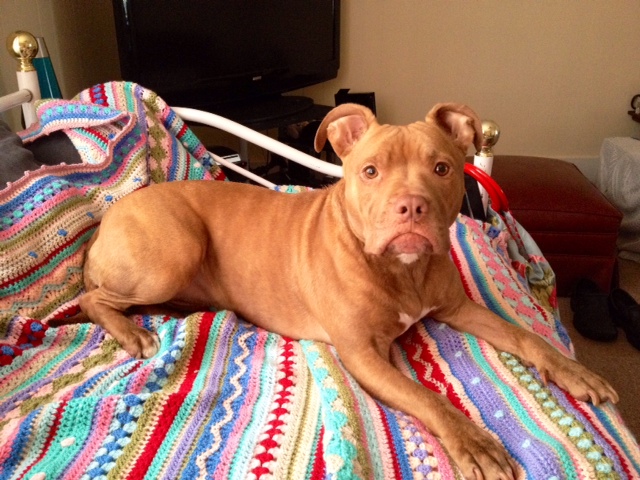
Here’s a final photo of my dog on the blanket:

as we go stripey blanket crochet a long

PDF pattern for the CAL (with step-by-step photos)

Working through the day I have finished turning the as-we-go stripey blanket CAL into a PDF with the photos included.  This version is not so printer friendly as the photo-free version — this one’s over 80 pages!  But for those who want to follow the instructions without being online, this will hopefully help out.

click here for PDF pattern

Enjoy!

cal114

PDF pattern for the CAL blanket available!

As requested by a few people, I have made a PDF version of the as-we-go stripey blanket!  This version does not include the step-by-step photos — it is meant to be printer-friendly.  Hopefully soon I will get the chance to make a PDF that does include the photos, as well.

click here for PDF pattern

Enjoy!

cal114

CAL pattern page is up

Thanks again to everyone who has watched and participated throughout not your average crochet’s first crochet along!  I have compiled all the posts into one page for your convenience.  To access this page, you can go to the menu bar: tutorials >> crochet tutorials >> patterns >> as-we-go stripey blanket.  You can also click on the button in the sidebar to the right that says “as-we-go stripey blanket free pattern.”  You can also

click here

I hope you have all enjoyed it, and don’t forget to email me pictures when you are done so that I can start that gallery!  Please include your preferred name if you want it to be included with your picture.  Send the largest version you have to davish14 AT winthrop DOT edu   Please do not hesitate to use that e-mail address or to comment here if you see any problems or mistakes in the pattern page, or if you have any questions!

Hopefully you will all stick around now that the CAL is over — I do plan on having a giveaway soon in addition to my regular knitting and crocheting posts!  I’m about to move to another city so it will probably be after that, but I promise it’s coming (and if you remember my last giveaway you’ll know it won’t be a small cheap gift)!

Thanks for stopping by, I hope to see you back soon!

CAL: the border

Hello everyone!  It’s sad to say that this is my last instructional CAL post.  I sincerely hope that each and every one of you have enjoyed watching or participating in this project; I can tell you that every part of it has been a joy for me, from actually crocheting the blanket to taking over 100 pictures to writing it all up and to answering your questions and comments.

Today’s post is to give instructions on the way I made my border (in US terms), but feel free to make it your own way or leave it off entirely.  If you do make a different border, I would recommend that your first row around your blanket be a sc row because that will help give your edges some stability.  Here’s a picture of my completed border:

cal112

It’s a pretty simple (but sturdy) sc border with a cute picot edging.  Here’s how I did it:

border row 1

Connect your chosen border color to the bottom left corner of your blanket.  Make 1 sc in each chain loop:

cal106

When you reach your corner, make sure you add at least 1 sc so that the corner will turn properly:

cal107

When crocheting up/down the sides of your blanket, spacing the stitches can be difficult.  I recommend firstly that you crochet around the entire stitch at the end of each row; it’s much easier than trying to slip your hook into the middle of each and every stitch.  When you come across a row ending/beginning in a sc, make 1 border sc around it.  When it’s a hdc, make 2 border sc around that stitch.  When it’s a dc, also make 2.  When it’s a treble, make 3 stitches around the treble stitch.  Some people prefer to do just 1 stitch around the hdc stitches, but you can experiment and see what works best for you (some people find that just using 1 stitch can make the border too tight or that 2 can make it too loose, depending on the gauge etc.).  In the case of the star stitch, I placed 3 sc on top of it:

cal108

When you reach the beginning of your border, slip stitch to close the round, ch1, and begin row 2.

border row 2

Work sc stitches into every stitch of your first border row, remembering to put in extra at the corners.  Close the round and begin row 3 the same way.

border row 3

Work 6 sc stitches.  Here’s where we make the first picot.  Start by chaining 3:

cal109

Slip your hook into the first of the 3 chains:

cal110

Yarn over and pull through the 2 loops:

cal111

Without skipping any stitches, make 6 more sc stitches in the row below.  Make another picot.  Continue making picots every 6 stitches until you come to the end.  Tie off and weave in your ends, and you’re done:

cal112

blocking

If the edges of your blanket are too uneven for your taste, feel free to wash and block your blanket according to your particular yarn label.  I myself did not do this with my blanket.

cal113

At this point my blanket is so large that I couldn’t get a good photo square on, but you can see all of the rows there.

cal114

And folded up:

cal115

Well, that’s everything!  It’s been such a pleasure having you aboard and watching your blankets develop through your pictures on facebook.  Thank you so much for making this such a special experience!

the as-we-go stripey blanket CAL pattern

I will compile all the CAL posts into one long page and stick it permanently in the menu bar at the top of this blog so you can always find it.  Some of you have expressed a desire for a downloadable PDF pattern, as well.  I’m honestly not sure if that will happen — I’ve never made a PDF pattern before and am not exactly sure how to go about doing it properly (and without making it a zillion pages long).  I will give it a shot, though, and if it works out I will post the link to it and let you know.

 If you’d please read on, I have one last thing I want to mention.

a request

I would like to arrange a permanent page on this blog as a photo gallery with pictures of everyone’s finished blankets.  When you are completely finished, I’d be so grateful if you could take a lovely picture and e-mail it to me at the photo’s full size.  Also, in the email please let me know if you would like for your name to appear with your picture, and what name I should use.  Here is the email address you can use:  davish14 AT winthrop DOT edu

Again, thank you all so much for participating — it’s really been humbling and at the same time very exciting to see this pattern taking shape all across the world.  I hope you all enjoyed it and feel free to continue to leave questions and comments about the CAL.