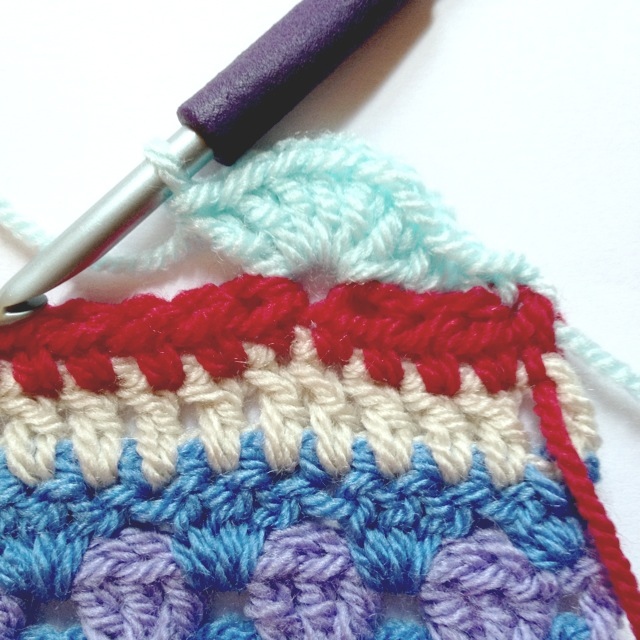
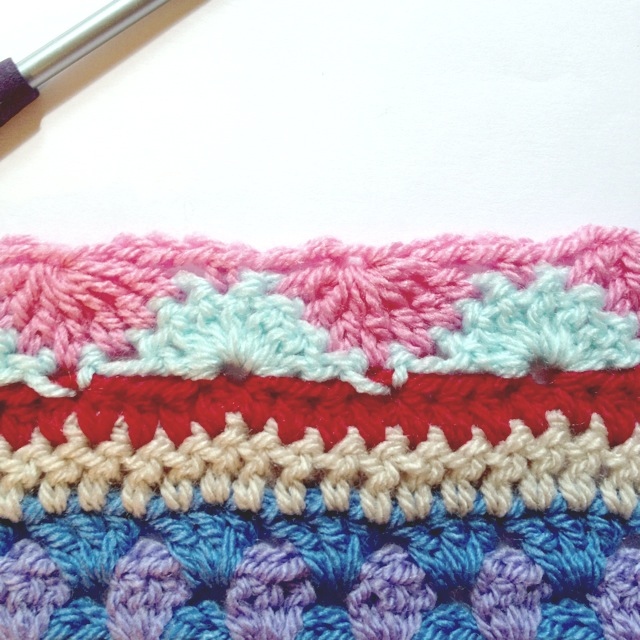
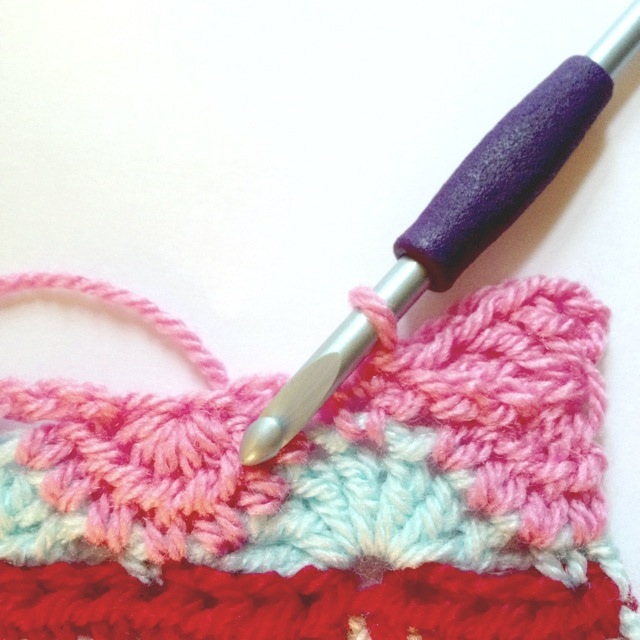
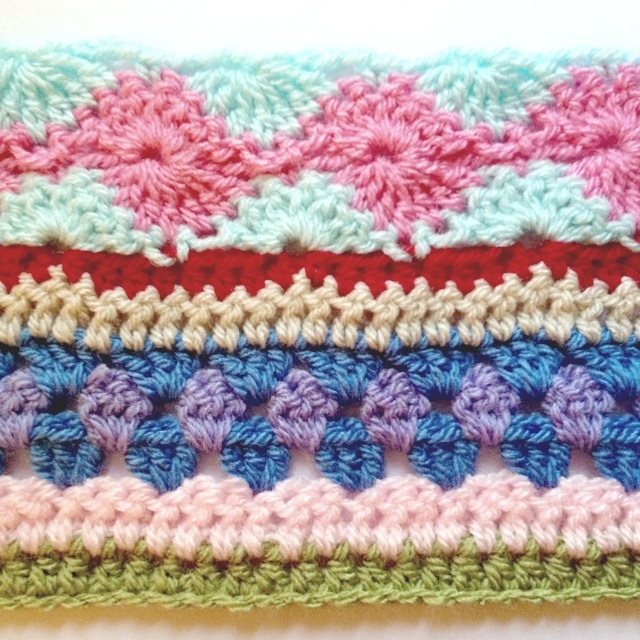
it’s time: CAL, BEGIN!

Alright everyone, grab your hook and yarn — it’s finally starting time! Let’s dive right into our “As-we-go stripey blanket” crochet along! We’ll be doing our foundation chain and 5 easier rows this week, and I’ve got pictures for step-by-step demonstration.  And don’t forget, I’m using US crochet terms! Here’s a handy chart:

crochet terms conversion chart

foundation chain

Begin by chaining any multiple of 24 (i.e. 96, 120, 144, etc., and don’t chain too tightly!). Then chain 2 more for our turning chains. With my DK weight yarn and my H/8/5mm, I chained 194 total to make my throw about 50″/127cm wide, but you make yours however long you want to! As long as it’s a multiple of 24 plus 2 you’re fine! Double, no, TRIPLE check you have the right number so you don’t have to start over later!  Edit: I should also say that because the 2 turning chains count as your first hdc, you should have an odd number of stitches for every row in your blanket (you will have a multiple of 24 + 1 stitches).  So for example, since I chained 192 + the 2 turning chains that count as 1 stitch, I will have 193 stitches in all of my rows.

row 1

In the 3rd chain from your hook, make 1 hdc:

cal1

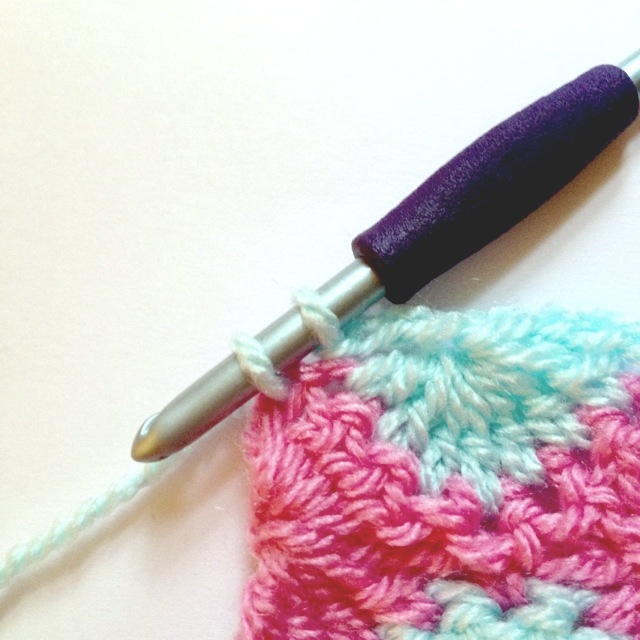
Make hdcs all the way across, but don’t pull the final loop through the last stitch! Stop at this point:

cal2

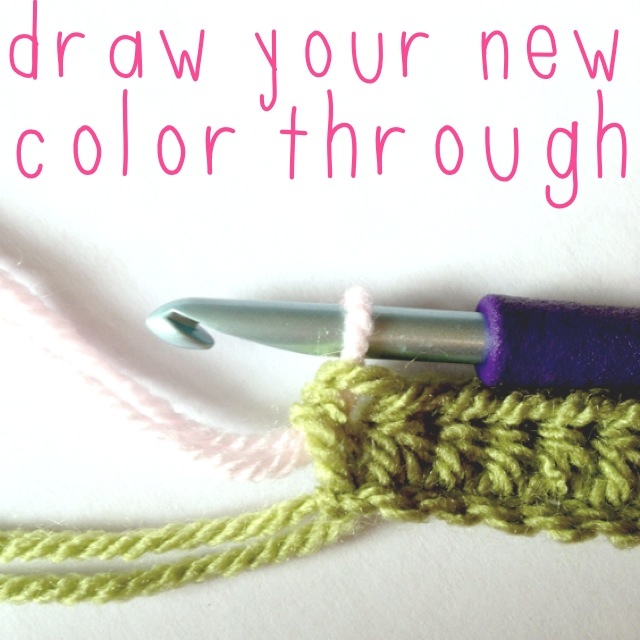
To finish the row, pull your next color through to finish the stitch. This is how we will finish every row where we change colors:

cal3

Ch 3 and turn.

row 2

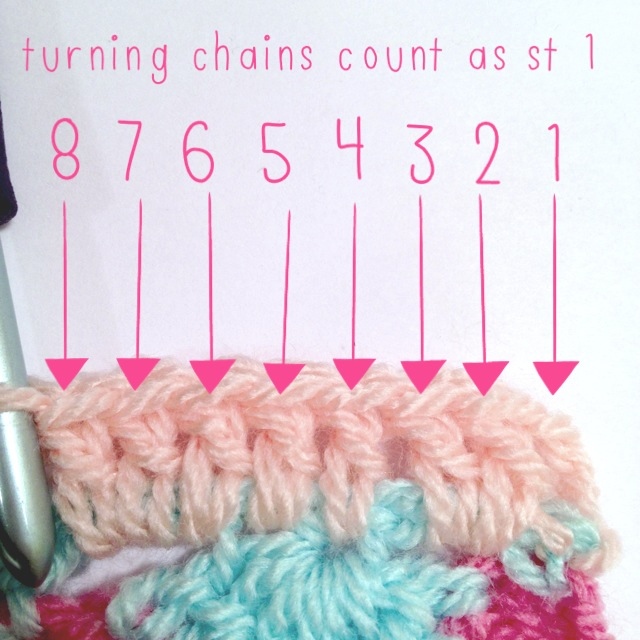
The turning chains count as your first stitch of the row (and will for all rows to come unless otherwise specified). dc in each stitch across. You can work over your tails for rows like this so that you don’t have to sew them in later:

cal4

I like to crochet over the tail for at least 5 inches before snipping the end of it. At the end of this row, pull your next color through, ch 3, and turn.

row 3

Make 1 dc in the 1st stitch:

cal7

Skip 2 sts, work 3 dc in next st:

cal8

Continue this until the end, making only 2 dc sts in the last st of the row. Pull next color through, ch3, turn.

row 4

Make 3 dc in space between the 3 dc clusters in the row below:

cal10

Repeat this pattern until the end. Make 1 dc in the top of the turning chains of the row below:

cal11

Change colors. I’m using the same one as row 3. Ch 3, turn.

row 5

Repeat row 3! Then:

cal15

Don’t leave your ends unwoven til the very end, or you’ll never want to do them!

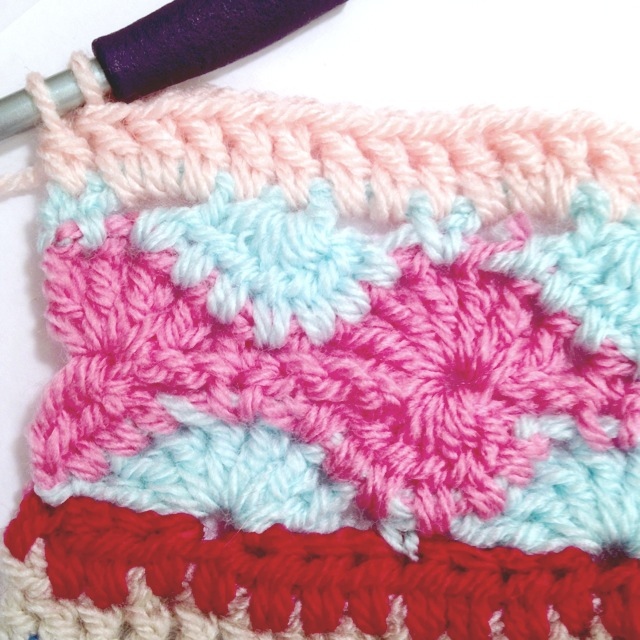
So this is all for this week:

cal14

This took me about an hour and 30 minutes (including weaving the ends), so hopefully a wider blanket won’t increase the time by too much.

I hope you enjoy! Please feel free to post any pictures to the Ravelry group page or the new facebook page — I’d love to see!

Thanks so much for participating — I’m really excited and I can’t wait to continue making our lovely blankets grow!

Edit: on Instagram use the tag #nyaccal and we can all see your progress!

how the CAL will work

Hello everyone!  I just wanted to give some specifics on how the crochet-along will go down, since we’re only 11 days away!

Firstly, to give good instructions and make sure everything is just right, I’m going to be a week ahead of everyone else.  I didn’t want to do it that way, but it works best since there’s no written pattern yet.  This way I can show you exactly how to do what I’ve done by posting instructions and pictures.  Also, since the blanket will be made up as we go along, that will give me the chance to make sure everything is just right before passing it on to you!

And, as you know, this is the yarn I will be using:

my yarn

my paletteIt’s Stylecraft Special DK, a soft acrylic yarn.  I will be using an H/8/5mm hook with it.  The pattern will be the same for everyone, regardless of your yarn choice or hook size or blanket size, because I’ve done the maths correctly and the beginnings and ends of all of our rows will be exactly the same!

I’ve decided to make a throw blanket 50″ or 127cm wide and about 76″ or 193cm long.  That’s basically the size of a twin/single bed blanket, just not quite as long.  Check out the chart on this site to see standard mattress and blanket measurements for all mattress sizes.

There  will be a weekly post with instructions for the next few rows sometime every Saturday (beginning on June 1).  Most of you were happy to do even more than 6 rows a week, but a few people won’t have quite the time for so many (especially those making very large blankets), so we’re going to go for just 4 to 6 a week (depending on the pattern).  The weeks with difficult stitches will have fewer rows, at least at first.  If that is too fast for you for any reason, please go at your own pace!  I don’t want to rush anyone and the instructions will still be there in the CAL category for you whenever you find the time.  In fact, when the CAL is over, I will compile all the posts with the instructions and pictures into one permanent pattern page that will be available in the menu bar for easy access.

Is there anything I’ve forgotten to mention?  Any questions you have?  Oh, I’m so excited!

Thanks for stopping by!

buttons, the CAL, and more

I haven’t been working on any projects this week other than tidying up the apartment.  It’s gotten SO BAD — I’d be embarrassed to have people over.  With tidying comes yarn organizing, too, of course.

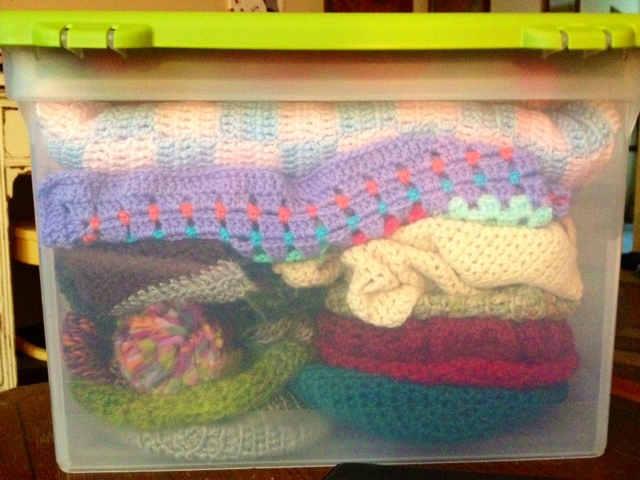
giveaway binThis new bin is full of projects to give away.  It’s full but can be squished down to add more.  Now that these items are in this bin and not in my yarn drawers, I have room in the drawers for the yarn that’s been in bags on the floor.  Now I just need a place for this bin…


As you might also not be able to see if you’re using your phone, the countdown widget says we have 17 days to go until we start the CAL!  I hope you’ve ordered any yarn that needs to be shipped to you by now, just to make sure you get it in time!  This is very exciting, and I’m 95% sure I’ll be making a throw sized blanket.  This way I’ll actually have a blanket for my couch that isn’t super-huge, and I’ll have extra yarn for any other projects I might want to make later.  If you’re planning on making a bigger blanket, never fear — we’ll still only be going a small number of rows per week.

That’s a good question to ask you all, actually.  How many rows would you like to do per week?  It’ll obviously have to be more than 1 if we want to finish any time this year, but I hesitate to go over 6 since I know some of you will be making bigger blankets and that will take more time.  6 would mean you could just work 1 row a day and have 1 day off each week, if that makes it easier.  What do you think would be a good number?  I’ll try to average your responses so that everybody is at least comfortable.

There are more topics to write about but this post is long enough, so they’ll have to wait.  Thanks so much for stopping by, and I hope you check out some of those button links!  And don’t forget to let me know how many rows you want to do per week!

my CAL yarn

My CAL yarn came in the other day!

my yarn


There are more skeins than this but this represents every color I purchased.  The colors are a little off in the picture as well — the hot pink at the top is actually not that “hot,” and the red doesn’t glow like that, haha.  Anyway, here’s the way I keep track of colors:

my palette


You can see that I marked the Pale Rose shade as the border shade, just so I don’t forget and accidentally use it for a stripe or something (I only got 1 skein of it, and 2 of all the others).  In this photo, the apricot and candyfloss colors are a little duller than they actually are in real life.  With these little tags it’s easy to keep track of how many times I’ve used each color (I put the tag to the side when I’ve used the color in the blanket so that I use every color once before using any color again).

So, participants, have you been practicing any difficult stitches?  Have you received your yarn?  I can’t wait to get started!

finished just in time

In my last post I told you that I was making a cowl for a friend visiting from England, but that there were only 3 days in which to make it.  The deadline was met!

cowl1

Yep, I finished it in the car on the way to see her.  It’s not as thick as I would have liked but I simply ran out of time.  Good thing I used the crocheted linen stitch instead of trying to do the knit linen stitch, which would have taken much longer!

cowl5


Since the strips of color in the yarn weren’t very long, it looks more like a rainbow camouflage than I had hoped, but it is still very pretty and my friend loved it!

And, since she’s from England, my chef boyfriend Chris decided to do a Southern dinner for her!  We started off with mini crab cakes with jumbo lump crab meat and a dill sauce (no picture for those).  Then we had a low country boil.  Now I should explain a bit about this Southern tradition:  the low country boil is, I believe, unique to the coastal area (aka “low country”) of South Carolina and traditionally includes corn, red potatoes, some kind of sausage, and shrimp.  These ingredients are all boiled together in one pot (often outdoors over a propane burner) with bay leaves or bay seasoning of some sort, strained, and then dumped right onto the PVC coated table cloth.  Well, we did ours inside and didn’t dump everything on the table, but here’s what it looks like (after 6 servings have been taken out):

low country boil


It’s a messy meal because the shrimp aren’t peeled yet and you eat everything with your fingers, but it’s very, very tasty!  Chris also made some homemade butter (with some herbs I can’t remember mixed in) for the corn and potatoes.

Then he made dessert: mini apple pie tarts!  But these were no ordinary tarts: the crust was puff pastry, the apple pie mixture was fresh apples, apple sauce, and bourbon, and there were two unusual additions.  A baked cheese cracker was added, along with candied bacon that Chris made his own rub for.  It was AMAZING:

bacon apple tart


I must say it looked better in real life — you know, I’m sure, that it’s hard to photograph food.  But it was very delicious and I was so proud of Chris!  Everyone loved all of it!

Hopefully we’ll get to see our visiting friend again before she leaves, but she’s headed to the mountains for a few days with the person she’s staying with, so we’ll see.

Well, that’s all for today.  There’s another post lined up but it can wait until later tonight/tomorrow.  Thanks for stopping by!