I love all the pictures you’ve posted on facebook and Ravelry so far! Your blankets are all looking great! Ready for the second installment? Off we go!
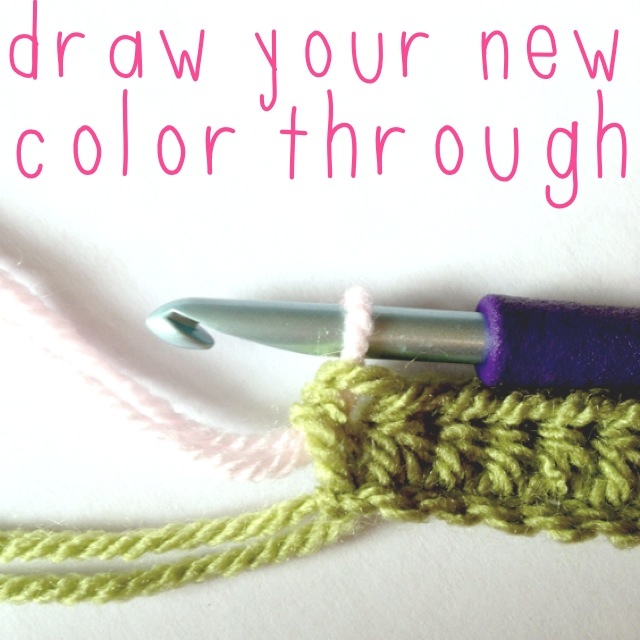
By now we’ve established how we’re starting rows and changing colors, so let’s skip those details now to save time. You’ve got this! Oh and don’t forget we’re using US terms!
row 6
With new color, dc in each st across
row 7
With new color, hdc in each st across

row 8
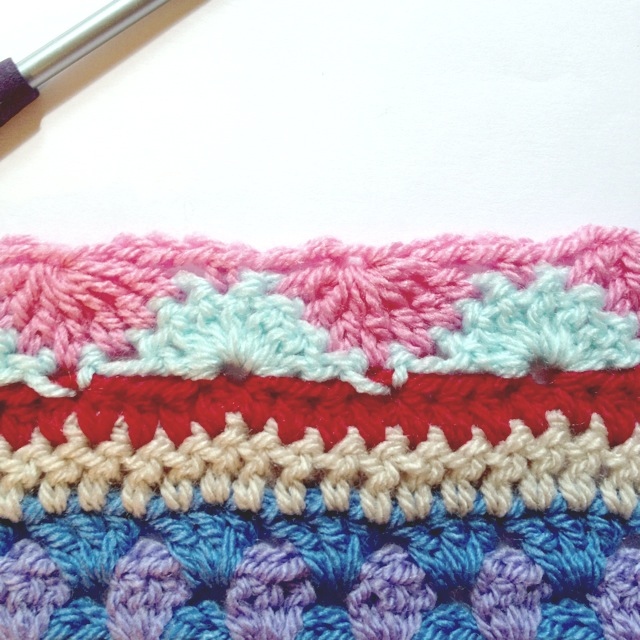
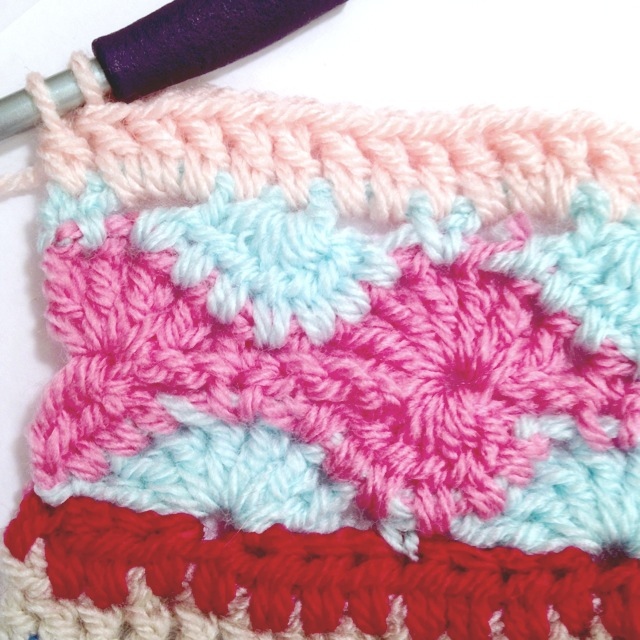
This will be the Catharine wheel pattern. DO THESE 4 ROWS LOOSELY OR YOUR BLANKET WILL HAVE UNEVEN EDGES. With new color, ch1; sc in same st:
 Skip 3 sts, 7 dc in next st:
 Skip 3 sts, sc in next st. Skip 3 sts, 7 dc in next st. Continue this shell pattern to end, leaving the last sc unfinished so as to change colors:
 row 9
row 9

Remember to keep your stitches loose! With new color, ch 2:
 In the next 3 sts, make a dc but do not pull the last loop through any of them yet:
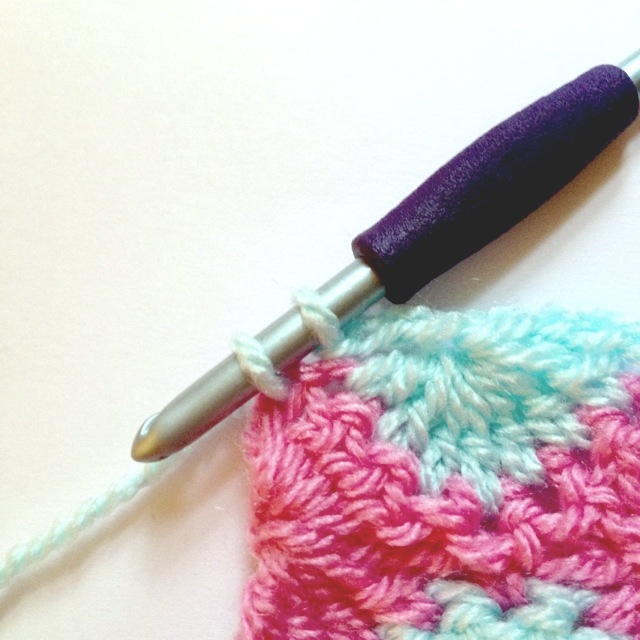
 When you have 4 loops on your hook and it looks like this, yo and draw through. We’ll call this a “cluster” of 4:
 Ch 3, sc in top/middle stitch of the bottom shell. Ch 3, in next 7 sts dc but do not finish stitches, as in the beginning. Yo and draw through to finish the st (making a “clutster” of 7). Ch 3, sc in top of shell below. Continue this pattern until the end. The last “cluster” will be 4 sts only:
row 10
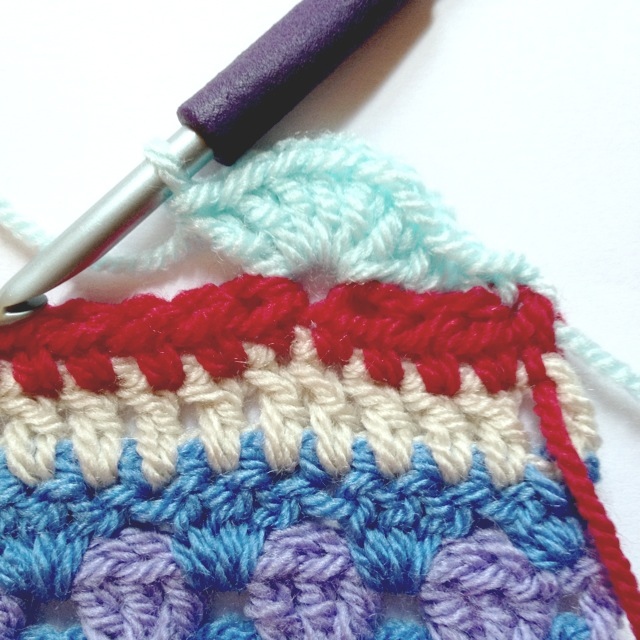
Remember to keep your stitches loose! With same color, ch3 and dc 3 in first stitch; sc in the sc below:
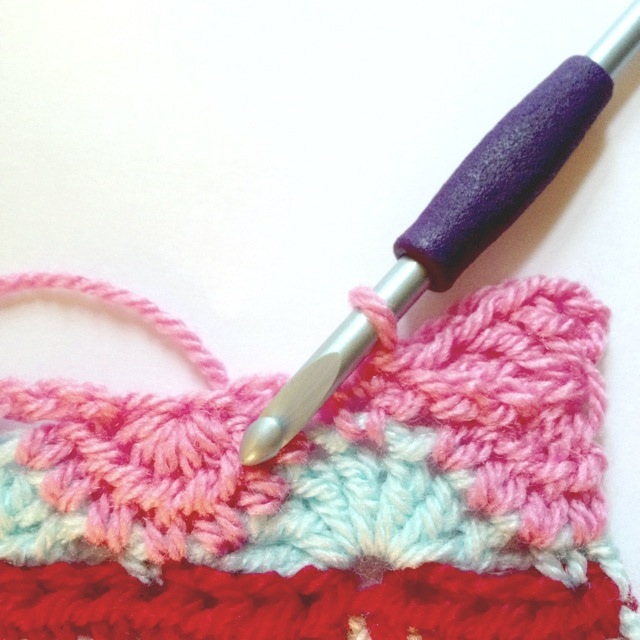 In the center space of the next “wheel,” dc 7. Sc in next sc. Continue this shell pattern until end:
 In the last st, there is only half of a shell to be made, so dc 4 and prepare to change back to the same color as our first row of the Catharine wheels:

row 11
Don’t forget, loose stitches! Ch 1, sc 1 in same st:
 Ch3, make the same “cluster” of 7 dcs as in row 9, ch 3, sc in top of shell. Continue until end:
Leave the last sc incomplete, as per usual, to change to the next color:
row 12
Back to regular tension. This is a row of dc, but the tricky part is getting the right number of stitches. Ch 3 to count as first st:
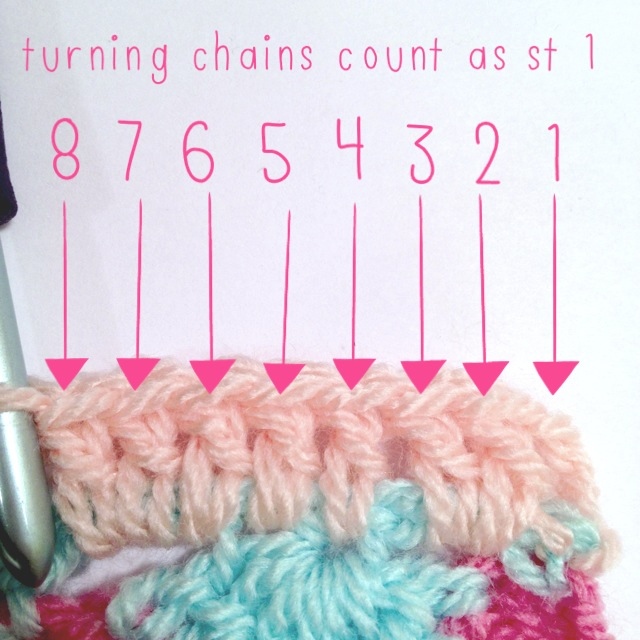 You can see that stitches 2 and 3 are around the chain below, stitch 4 is in the “eye” of the wheel, stitch 5 is in the stitch right before the next ch 3 space, stitches 6, 7, and 8 are over the next ch 3 space. Continue this method of 8 stitches until the end. Keep track by remembering that each sc in the row below signals stitch 1 of the pattern of 8. Dc in last st:
 Before moving on to the next row, count your stitches to make sure you have the same amount as when you started the blanket.
row 13
In new color, hdc in each st across:
 That’s all for this week! I hope it’s not too much at once, but it was pointed out to me that at the pace of 6 rows a week we would probably not finish by Christmas (which was the original goal, so that we may gift our blankets to others if we wish). Since so many of you finished within a couple of days last week, I thought adding 2 more easy rows wouldn’t be out of line.
If you have any questions, please feel free to ask. I know that the Catharine wheel pattern can be tricky and it is a bit difficult to explain. Hopefully the pictures will be enough to get you through so that you get the hang of it, but if not it’s OK, just ask about it and we can work through it together! Good luck and happy hooking!