Hello everyone! It’s sad to say that this is my last instructional CAL post. I sincerely hope that each and every one of you have enjoyed watching or participating in this project; I can tell you that every part of it has been a joy for me, from actually crocheting the blanket to taking over 100 pictures to writing it all up and to answering your questions and comments.
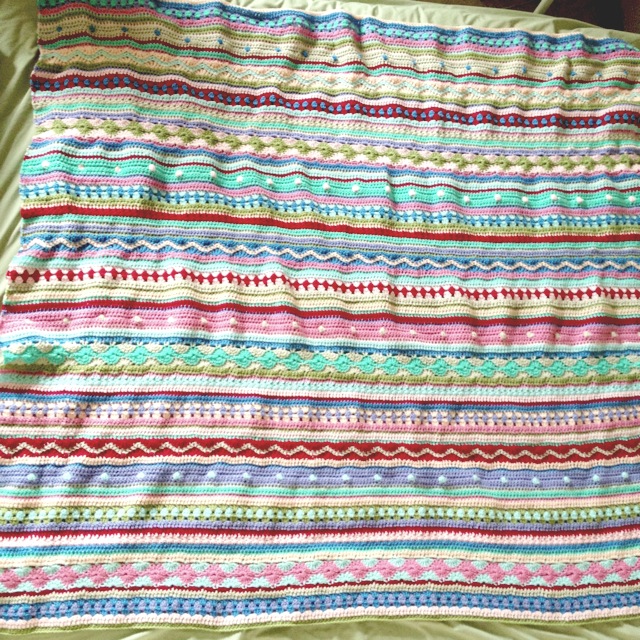
Today’s post is to give instructions on the way I made my border (in US terms), but feel free to make it your own way or leave it off entirely. If you do make a different border, I would recommend that your first row around your blanket be a sc row because that will help give your edges some stability. Here’s a picture of my completed border:

It’s a pretty simple (but sturdy) sc border with a cute picot edging. Here’s how I did it:
border row 1
Connect your chosen border color to the bottom left corner of your blanket. Make 1 sc in each chain loop:
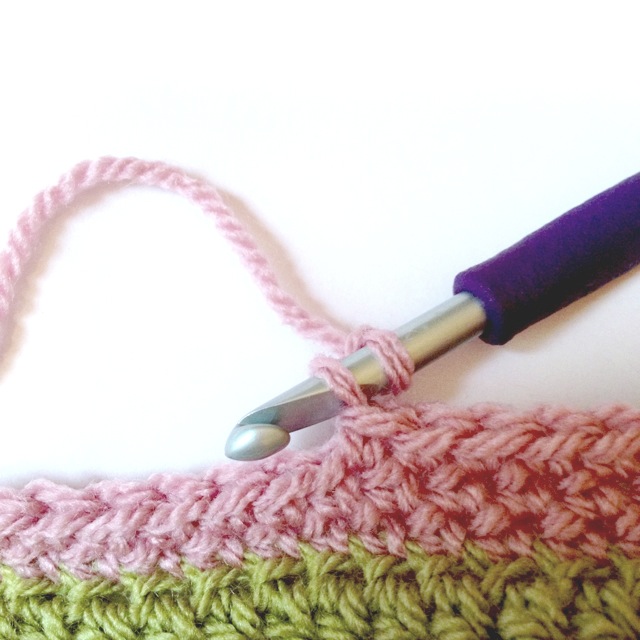
When you reach your corner, make sure you add at least 1 sc so that the corner will turn properly:

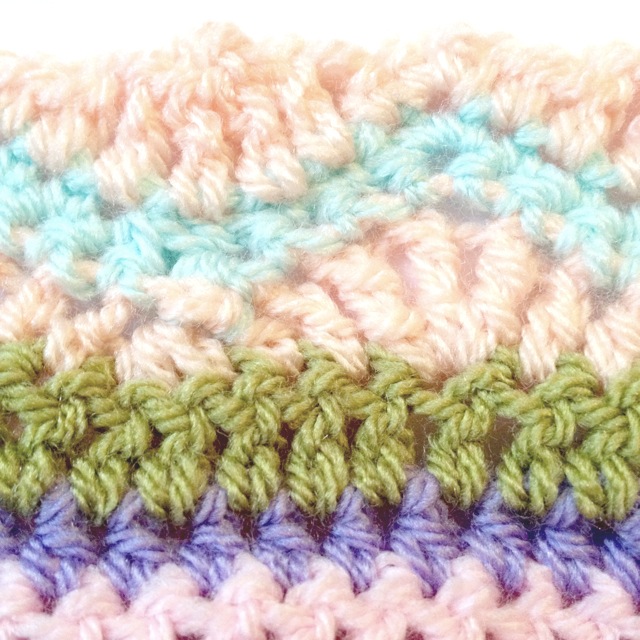
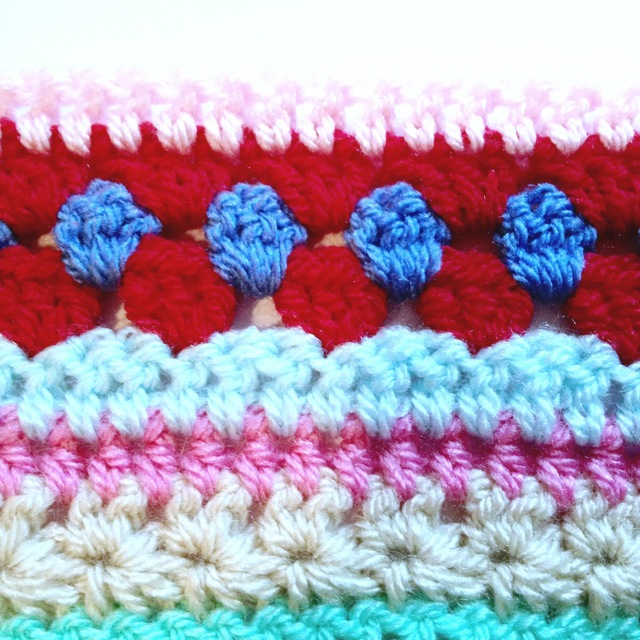
When crocheting up/down the sides of your blanket, spacing the stitches can be difficult. I recommend firstly that you crochet around the entire stitch at the end of each row; it’s much easier than trying to slip your hook into the middle of each and every stitch. When you come across a row ending/beginning in a sc, make 1 border sc around it. When it’s a hdc, make 2 border sc around that stitch. When it’s a dc, also make 2. When it’s a treble, make 3 stitches around the treble stitch. Some people prefer to do just 1 stitch around the hdc stitches, but you can experiment and see what works best for you (some people find that just using 1 stitch can make the border too tight or that 2 can make it too loose, depending on the gauge etc.). In the case of the star stitch, I placed 3 sc on top of it:

When you reach the beginning of your border, slip stitch to close the round, ch1, and begin row 2.
border row 2
Work sc stitches into every stitch of your first border row, remembering to put in extra at the corners. Close the round and begin row 3 the same way.
border row 3
Work 6 sc stitches. Here’s where we make the first picot. Start by chaining 3:

Slip your hook into the first of the 3 chains:
Yarn over and pull through the 2 loops:

Without skipping any stitches, make 6 more sc stitches in the row below. Make another picot. Continue making picots every 6 stitches until you come to the end. Tie off and weave in your ends, and you’re done:
blocking
If the edges of your blanket are too uneven for your taste, feel free to wash and block your blanket according to your particular yarn label. I myself did not do this with my blanket.

At this point my blanket is so large that I couldn’t get a good photo square on, but you can see all of the rows there.

And folded up:

Well, that’s everything! It’s been such a pleasure having you aboard and watching your blankets develop through your pictures on facebook. Thank you so much for making this such a special experience!
the as-we-go stripey blanket CAL pattern
I will compile all the CAL posts into one long page and stick it permanently in the menu bar at the top of this blog so you can always find it. Some of you have expressed a desire for a downloadable PDF pattern, as well. I’m honestly not sure if that will happen — I’ve never made a PDF pattern before and am not exactly sure how to go about doing it properly (and without making it a zillion pages long). I will give it a shot, though, and if it works out I will post the link to it and let you know.
If you’d please read on, I have one last thing I want to mention.
a request
I would like to arrange a permanent page on this blog as a photo gallery with pictures of everyone’s finished blankets. When you are completely finished, I’d be so grateful if you could take a lovely picture and e-mail it to me at the photo’s full size. Also, in the email please let me know if you would like for your name to appear with your picture, and what name I should use. Here is the email address you can use: davish14 AT winthrop DOT edu
Again, thank you all so much for participating — it’s really been humbling and at the same time very exciting to see this pattern taking shape all across the world. I hope you all enjoyed it and feel free to continue to leave questions and comments about the CAL.