It seems like everyone made it through the Catharine wheel stitch pattern last week, so I hope you’re ready for the next installment! Might I suggest doing this installment in at least 2 sit-downs — I did it all at once and my hands are very tired!
Here we go (and don’t forget we’re using US terms)! Last week, we finished with row 13:

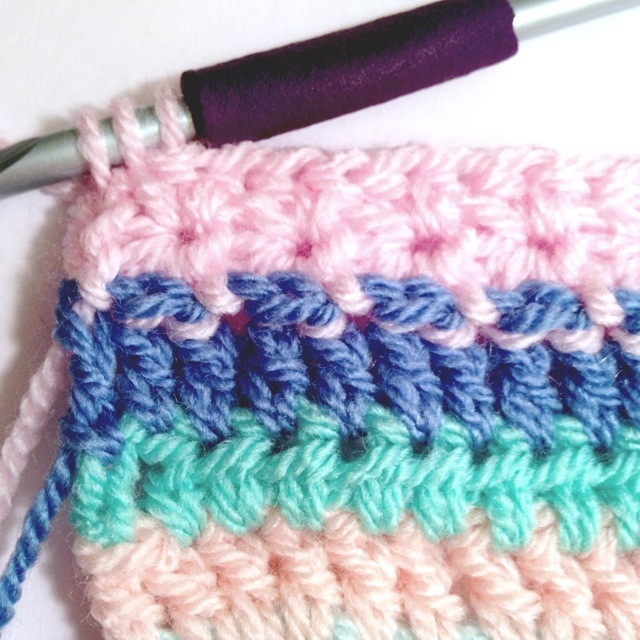
row 14
ch 3 and turn with new color, dc across.
row 15
This row begins the star stitch pattern. I’d recommend choosing a lighter color so that the stitches really show up! Each time we make the star stitch pattern, the first row of it needs to be on the right side of our work.
ch 3 and turn with new color:

Now we’re going to work into the chains we just made. In the middle of the 3 chains, insert your hook and pull a loop through. Then in the bottom chain, insert your hook and pull another loop through. It’ll look like this:

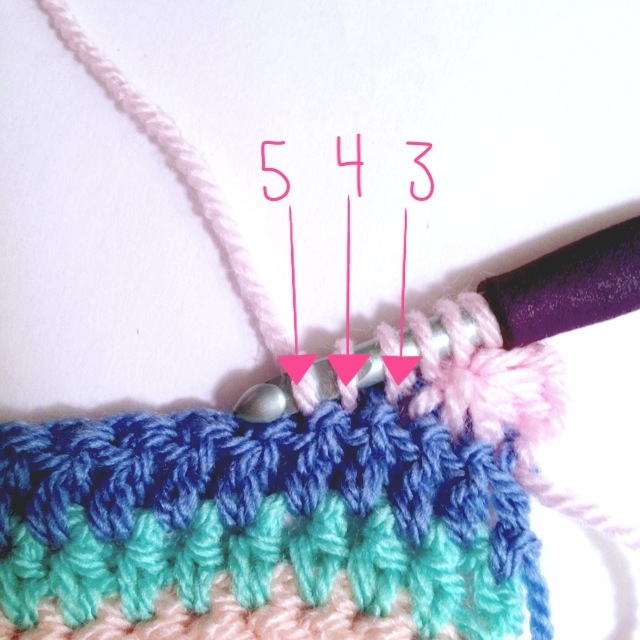
Now insert your hook through the last st of the previous row (or 1st st of this row) and pull up a loop. Pull up loops through stitches 2 and 3 as well:

You should have 6 loops on your hook. Yarn over and draw through all 6. Ch 1 to close the stitch and form the “eye” of the first star:

Insert hook into the “eye” and draw up a loop. Insert hook around the last “spoke” of the previous star and draw up a loop:

Pull up a loop from stitch 3 of the bottom row, where we pulled up the last loop of the previous star. Pull up loops from stitches 4 and 5 as well:
Yarn over and draw through all 6 loops, ch1 to close the star and form the “eye.” Continue in this same way (pulling up loops through the eye, around the last spoke of previous star, in the same st as the last spoke of the previous star, and in the next 2 stitches, and then chaining 1 to close the star) until the end.

At the end, you should have 1 stitch left. Make a hdc in it and keep the same color going:
Here’s what the back of your work should look like:
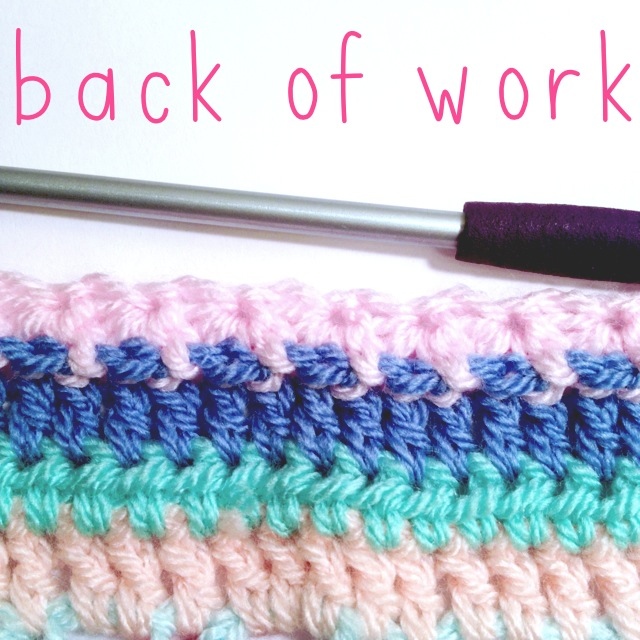
This is why the blanket has a front and a back to it. Next, ch 2 and turn.
row 16
Make 1 hdc in the “eye” of the last star of the bottom row:

In the next eye and all the rest to follow, make 2 hdc stitches:

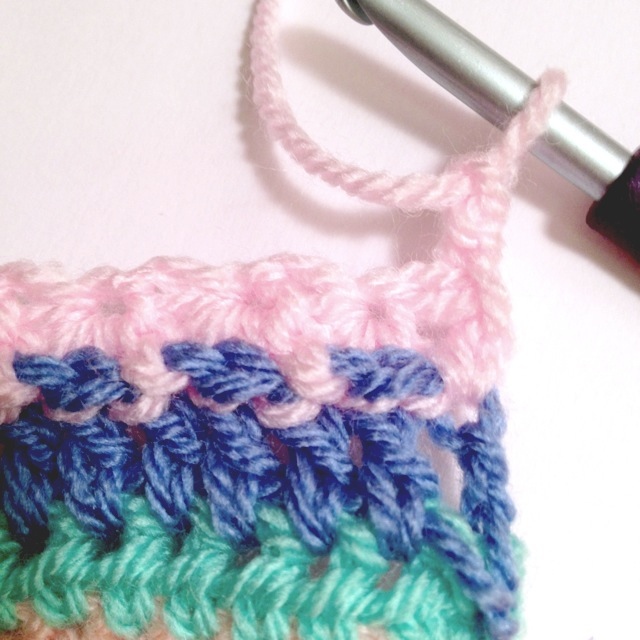
At the end of the row, make 1 hdc into the top turning chain you made in the row below, but don’t finish it because we’re done with the star stitch and we’ll change colors now:
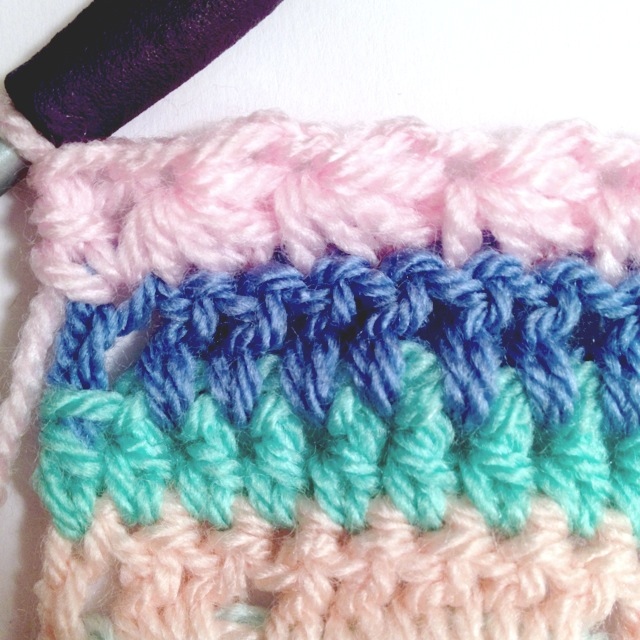
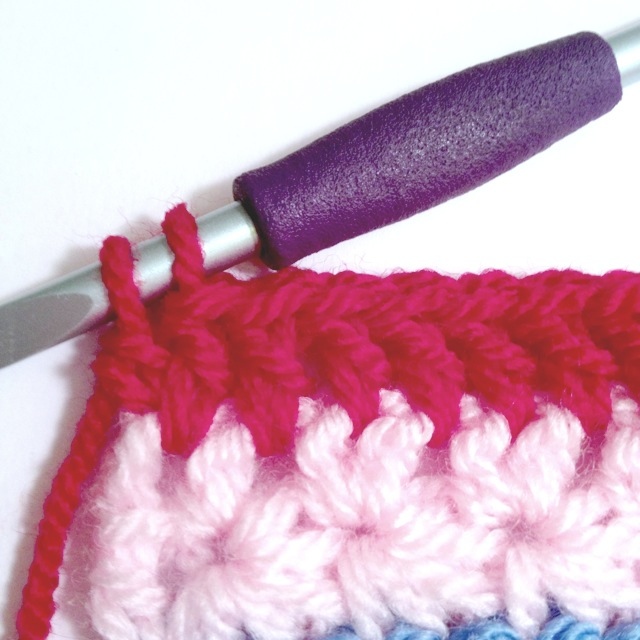
Here’s what the front of your blanket should look like after the star stitch rows are done:

Ch 3 with new color and turn.
row 17
This row is a regular dc row except we’re going to make our stitches in between the hdcs of the previous row. This is so there won’t be a ridge/line between the top of the star pattern and our new row (if you crochet across like normal you’ll see what I mean). I’m crocheting over my yarn tails here so I don’t have to weave them in later. Here’s what the first few stitches look like:

Keep crocheting into the spaces between the stitches of the previous row until the end. Since crocheting into the spaces shifted us over slightly, we’ll have to make what seems like an extra stitch at the end:
If you count, however (which you really should do now), you should have the same number of stitches as your very first row of the blanket.
row 18
With new color, dc across.
rows 19 – 21:
With 2 new colors (or 3 if you prefer), make another section of granny stripes. When we do granny stripes we also want the first row to be on the right side, and we must do an odd number of granny stripes or we won’t have the same number of stitches across (weird, I know, but the even granny stripe rows just don’t have the same number of stitches).
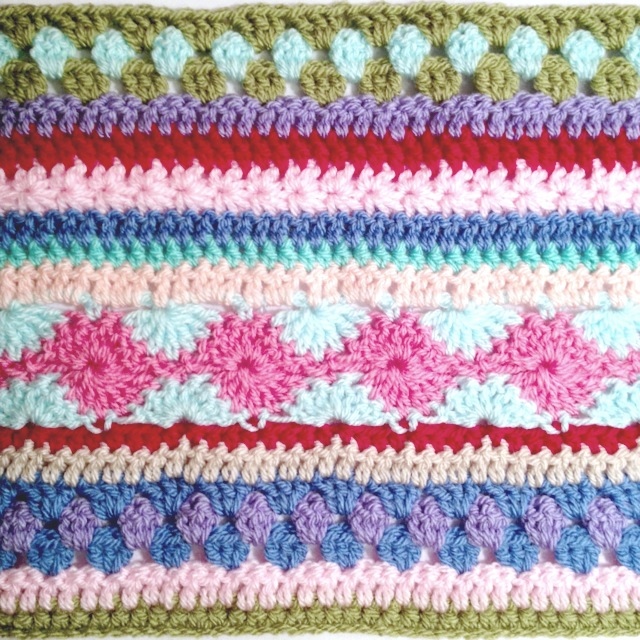
That’s our last row for the week, so I’d recommend counting your stitches to make sure you have the same number as when you started your blanket just one more time to be safe. Also, don’t forget to weave in your ends!
I hope you’re all enjoying the CAL so far. I’m certainly having a blast! As usual, if any part of this week’s installment was tricky for you, feel free to ask questions. If you can’t get the star stitch to work for you, just make 2 rows of hdc straight across instead and you’ll be fine!
And I should say thanks for joining us to anyone who’s just now starting — we’re glad to have you along! And thanks for all the facebook page likes! I’m enjoying all the photos being put up on facebook and Ravelry, as well. Please keep them coming — you’re all doing a fantastic job!
Well, until next week everyone! Thanks for stopping by!


I would like to thank you for all the time, effort and good will that you’ve put into this CAL. Thank you for getting us all together in such a wonderful project
LikeLike
You’re very welcome! I’m enjoying it immensely and I’m glad you are too!
LikeLike
I wish I had the time to do this it’s going to be a beautiful blanket, but I dare not start anything else until I finish some of my wips are complete. If I can I will start at a later date and hopefully catch up. 🙂
LikeLike
I was in the same predicament. I had tok .any wip I couldnt justiy another one. But I started anyway and I must admit, waiting for the next week inspires me to work onh exising projects throughout the week. I’ve already completed two of my wips! 🙂
LikeLike
Silly phone and all your typos. Too many* justify* on*
LikeLike
Reblogged this on New Buzz from the Bagg Lady and commented:
Here is week 3 and I am just starting on week 1!! I just love this blanket. If I were naming it I would call it a “sampler blanket”. Looking forward to catching up!
Cathy the Bagg Lady
LikeLike
Hello Hannah,
This will be a lovely blanket. Your explanations seem to be clear and so are your pictures. If you do some of these CAL’s in the future, I think I might join you. I have quite some WIP at this moment, I would feel too much behind already on this one.
Anyway, great project!
LikeLike
Hello,
I just wanted to let you know that I have nominated your blog for the WordPress Family Award. Your blog and your pictures are very inspiring, so many thanks for sharing!
Congratulations!
LikeLike
That is so very kind of you! I really appreciate it and I’m glad you like my blog!
LikeLike
Just finished this week’s rows – still loving it! Photos and story on my most recent post.
LikeLike
I finished my rows, too! The stars pattern is very pleasant to do. The photos will be posted on Facebook in the coming days.
Hugs from Brasil. Olga
LikeLike
Great! I’m glad you like the star stitch and I can’t wait to see the picture!
LikeLike
I just finished week 3! Loving this so much! Thank you for all the work you’ve put into this!!
LikeLike
I’m glad you’re enjoying it, and it is very much my pleasure! 🙂
LikeLike
Thank you for this wonderful project
LikeLike