life events

Life event #1:  I’m 25 years old now.

Life event #2:  I’m officially moving to another city!  It’s where my boyfriend works, and since I don’t have a real job at this point I figured I can just follow him and look for one there.  It’s going to be my first rented house (I’m in an apartment now)!  I’m excited, so I wanted to share some pictures with you!

photo 1


I believe it’s about 100 years old.  The back yard is completely fenced in, and I believe the man renting the house to us will allow me to do some gardening in the front so that the beds don’t look so sad.  Now about the inside pictures: the girl who has just vacated this property left a lot of trash and junk, but the landlord is going to clean it all up before we move in.

photo 2


This is the living room; the door on the right is the front door.  The place where I stood to take this is the dining room:

photo 3


The door to the left leads to some stairs to some attic storage, which is nice.  Then through the right of the dining room is the kitchen:

photo 5 photo 4


It’s very small but at least the paint is nice and light!  There’s no dishwasher, but I don’t mind washing dishes by hand.  The refrigerator is oddly not in the kitchen — it is around a corner:

photo 1 (1)


The washer and dryer will be wonderful since my washer and dryer both broke in the span of a week, and I’ve been going to the laundromat ever since.  Then to the right of these appliances is the back door:

photo 3 (1)


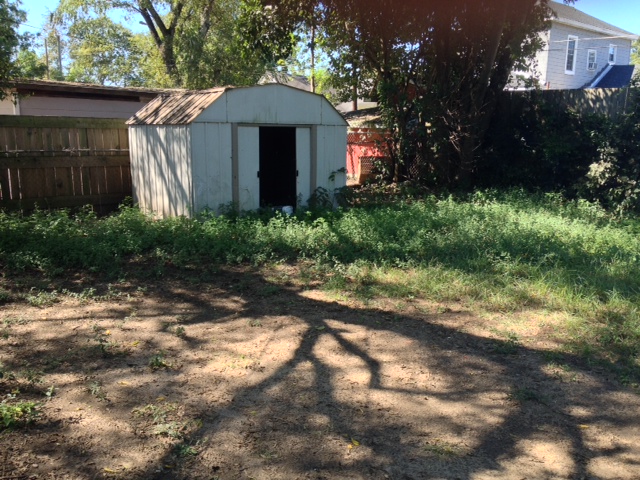
The yard comes with a storage shed.  It obviously needs to be mowed and stuff but that’ll be taken care of and it’ll be a lovely space for the dog, who has been cooped up in an apartment for 2 years.

photo 5 (1)


This is the spare room, which is off the kitchen (but there’s a little hall area that leads to this room from the living room, as well, so it makes a circle).  In the little hall is the bathroom:

photo 2 (2)


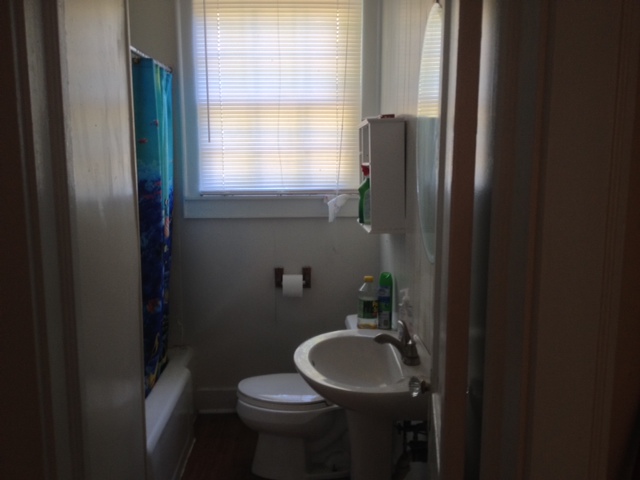
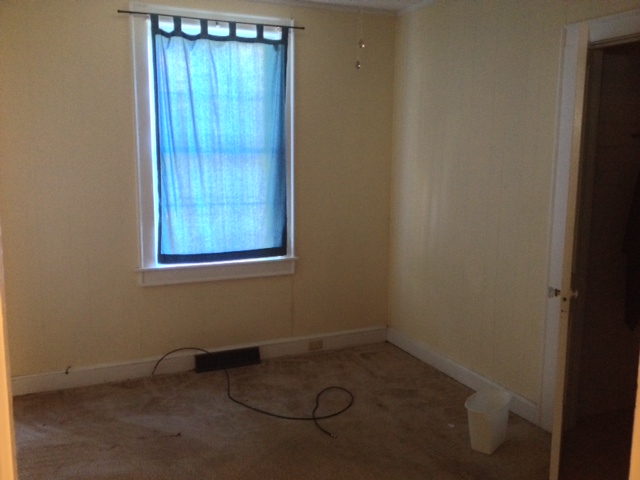
It’s absolutely tiny, and it’s the only one in the house.  I’ve got major Pinterest plans for it, though, so I think it’s going to be just fine.  I’ve got some good storage solutions already.  Then off the little hall is also the master bedroom:

photo 1 (2)


I don’t know why the girl left a recliner or all of her curtains… Well, they’ll have to go.  By the way, all of these rooms are bigger than they look — it was impossible to get far back enough to get a full picture with the camera on my phone.  There’s actually plenty of room in here as well as in the living room.  Lastly, one of my favorite parts is these:

photo 4 (1)


Most of the doors in the house have these lovely doorknobs, and I think they’re perfect!

I really do like the house.  I know it is kind of small but it is my first house and I feel like it’s a very lucky thing to have found (especially since rent is lower than expected and the owner has no problem with letting a pit bull live there — I’m telling you, it’s a nightmare because nobody will give my baby girl a chance).  I think once all the trash and junk is gone and it’s cleaned up a bit it will be a very sweet house with nice character, and I can’t wait to move in and start decorating!  The landlord said stuff can be brought in in about a week, but our lease doesn’t officially start until mid-October so I won’t be living there for another couple of weeks.

My parents came up for my birthday and brought me not only a Boston creme pie and some good Arkansas barbecue but also a lovely old fashioned wooden bread box, which will be a lovely display and handy storage.  They took me shopping as well and got me some much needed shoes and pants, as well as a few things for the house.  I’m very lucky!

Life event #3:  Last night I went with my boyfriend and some of our friends to a birthday celebration dinner at my favorite Italian restaurant, and we had a snuggly outdoor movie afterwards.  All in all, a very very satisfactory and happy birthday weekend!

Oh and I almost forgot to mention this really cool blog that has tips for finding your decorating style — I followed the instructions and did indeed end up learning about how I truly want my home to be!  Click here for that.  Also if you want to see my moving/decorating Pinterest board, which is full of ideas for small bathrooms and small kitchens, click here.  Can you tell I’ve spent a ton of time on this already?  Hehe.  Well, it was once my plan to be an interior designer!

Thanks for stopping by today!  I’ll be back to yarny pursuits soon, I’m sure, but bear with me if it’s not as frequent as usual.  The move is going to take a lot of time!  See you soon!

CAL pattern page is up

Thanks again to everyone who has watched and participated throughout not your average crochet’s first crochet along!  I have compiled all the posts into one page for your convenience.  To access this page, you can go to the menu bar: tutorials >> crochet tutorials >> patterns >> as-we-go stripey blanket.  You can also click on the button in the sidebar to the right that says “as-we-go stripey blanket free pattern.”  You can also

click here

I hope you have all enjoyed it, and don’t forget to email me pictures when you are done so that I can start that gallery!  Please include your preferred name if you want it to be included with your picture.  Send the largest version you have to davish14 AT winthrop DOT edu   Please do not hesitate to use that e-mail address or to comment here if you see any problems or mistakes in the pattern page, or if you have any questions!

Hopefully you will all stick around now that the CAL is over — I do plan on having a giveaway soon in addition to my regular knitting and crocheting posts!  I’m about to move to another city so it will probably be after that, but I promise it’s coming (and if you remember my last giveaway you’ll know it won’t be a small cheap gift)!

Thanks for stopping by, I hope to see you back soon!

CAL: the border

Hello everyone!  It’s sad to say that this is my last instructional CAL post.  I sincerely hope that each and every one of you have enjoyed watching or participating in this project; I can tell you that every part of it has been a joy for me, from actually crocheting the blanket to taking over 100 pictures to writing it all up and to answering your questions and comments.

Today’s post is to give instructions on the way I made my border (in US terms), but feel free to make it your own way or leave it off entirely.  If you do make a different border, I would recommend that your first row around your blanket be a sc row because that will help give your edges some stability.  Here’s a picture of my completed border:

cal112

It’s a pretty simple (but sturdy) sc border with a cute picot edging.  Here’s how I did it:

border row 1

Connect your chosen border color to the bottom left corner of your blanket.  Make 1 sc in each chain loop:

cal106

When you reach your corner, make sure you add at least 1 sc so that the corner will turn properly:

cal107

When crocheting up/down the sides of your blanket, spacing the stitches can be difficult.  I recommend firstly that you crochet around the entire stitch at the end of each row; it’s much easier than trying to slip your hook into the middle of each and every stitch.  When you come across a row ending/beginning in a sc, make 1 border sc around it.  When it’s a hdc, make 2 border sc around that stitch.  When it’s a dc, also make 2.  When it’s a treble, make 3 stitches around the treble stitch.  Some people prefer to do just 1 stitch around the hdc stitches, but you can experiment and see what works best for you (some people find that just using 1 stitch can make the border too tight or that 2 can make it too loose, depending on the gauge etc.).  In the case of the star stitch, I placed 3 sc on top of it:

cal108

When you reach the beginning of your border, slip stitch to close the round, ch1, and begin row 2.

border row 2

Work sc stitches into every stitch of your first border row, remembering to put in extra at the corners.  Close the round and begin row 3 the same way.

border row 3

Work 6 sc stitches.  Here’s where we make the first picot.  Start by chaining 3:

cal109

Slip your hook into the first of the 3 chains:

cal110

Yarn over and pull through the 2 loops:

cal111

Without skipping any stitches, make 6 more sc stitches in the row below.  Make another picot.  Continue making picots every 6 stitches until you come to the end.  Tie off and weave in your ends, and you’re done:

cal112

blocking

If the edges of your blanket are too uneven for your taste, feel free to wash and block your blanket according to your particular yarn label.  I myself did not do this with my blanket.

cal113

At this point my blanket is so large that I couldn’t get a good photo square on, but you can see all of the rows there.

cal114

And folded up:

cal115

Well, that’s everything!  It’s been such a pleasure having you aboard and watching your blankets develop through your pictures on facebook.  Thank you so much for making this such a special experience!

the as-we-go stripey blanket CAL pattern

I will compile all the CAL posts into one long page and stick it permanently in the menu bar at the top of this blog so you can always find it.  Some of you have expressed a desire for a downloadable PDF pattern, as well.  I’m honestly not sure if that will happen — I’ve never made a PDF pattern before and am not exactly sure how to go about doing it properly (and without making it a zillion pages long).  I will give it a shot, though, and if it works out I will post the link to it and let you know.

 If you’d please read on, I have one last thing I want to mention.

a request

I would like to arrange a permanent page on this blog as a photo gallery with pictures of everyone’s finished blankets.  When you are completely finished, I’d be so grateful if you could take a lovely picture and e-mail it to me at the photo’s full size.  Also, in the email please let me know if you would like for your name to appear with your picture, and what name I should use.  Here is the email address you can use:  davish14 AT winthrop DOT edu

Again, thank you all so much for participating — it’s really been humbling and at the same time very exciting to see this pattern taking shape all across the world.  I hope you all enjoyed it and feel free to continue to leave questions and comments about the CAL.

CAL: week 17

Hello everyone!  Are you ready for week 17?  It doesn’t seem like it’s been that long, but it’s been long enough for my blanket to reach it’s intended size (actually it’s bigger than I’d intended).  It covers the top of a double bed and is completely square after finishing this week’s rows.  Definitely a large throw.  This means that I am finished with my blanket, excepting the border, which will have a post all it’s own very shortly for those who want instructions.  If your blanket is not the size you wish it to be at this point, by all means carry on.  At the end of this post there will be some suggestions for you that you can choose to follow if you like.

Well, let’s get started, remembering that we’re using US terms.  Last week we finished row 124:

cal102

row 125

With new color, hdc across.

row 126

With new color, dc across.

rows 127-129

With new colors, work the granny stripe pattern (original instructions here).

row 130

With new color, dc across.

row 131

With new color, hdc across.  Fasten off (if you are done with your blanket) and weave in your ends!

cal103

Ta-da!

cal104

notes for those who wish to continue with their blankets

1. This last installment has 7 rows instead of 8, so be conscious of your right and wrong sides as you continue.

2. The way I chose the order of the stitch patterns was pretty random except for the bobble rows.  I tried to evenly space the bobble rows from each other, hoping that evenly spaced big bands of color would tie the whole thing together nicely.

3. If you would like to follow a specific pattern, I’d recommend going back, working row 8, and continuing from there.  That would be the first Catharine wheel row.  That should keep the bobble rows evenly spaced and will also keep your right and wrong sides correct.

about the next CAL post

There will be one last post about the border in a few days.  You can choose not to do a border at all, you can follow the instructions that I will have available for you, or you can choose to do your border completely differently than mine.  In whatever case, there will be some recommendations for border construction and pictures of my own border in the upcoming post, as well as my thanks, some extra CAL tidbits, and a question I will have for all of you.

credit

Let’s take a look back at our inspiration.  The lovely blanket was made by Julie at Little Woolie, and I must say that I’m a bit embarrassed that my blanket came out so close to hers; despite some efforts I made at the beginning to make them different, they do look so alike, particularly at first glance.  I’m much relieved to say that she is OK with it all, because I did have some pangs of guilt there at the end.  However I’m very happy with my blanket and I really do mean this as a credit to Julie’s lovely work — she is an inspiration in many ways!  Please, however, if you pin that last picture to Pinterest be aware that it is not my blanket or picture and that credit should therefore not be given to me.  If you wish to pin her picture, please go here and do it from her page so that she can get the credit that she deserves.  I’ll appreciate it, and she will too!

a project for a friend

My friend Tara, for whom I made this hat, met me for lunch the other day at a cafe near the local yarn shop.  She went with me after we ate to just browse through the yarn, and ended up purchasing some yarn and a pattern booklet for me to make her a second item!  The yarn is K’acha from Mirasol Yarn (of merino, alpaca, and silk) in shade 1201:

yarn for tara

What a lovely color for fall!  The yarn is listed on Ravelry as being DK weight but it seems more like a heavy worsted as I’m working.  Anyway, Tara bought 4 skeins to be sure there was enough for the whole project.

The shawl/scarf is called “bajada,” it is knit on size 8 straight needles, and is more crescent shaped than triangle shaped.

I would like a similarly shaped shawl/scarf myself, but I don’t think it’ll be another one of these — this pattern is so hard!  You have to have your eyes glued to the booklet instructions — every row of small print contains a different combination of “stitch pattern A” and “stitch pattern B” so you have to pay careful attention!  In fact, I couldn’t keep track of it all in my head so I wrote out the combinations for each row (as well as reminders to increase every 4th row) on notebook paper and am checking them off as I go.  I think that’s what makes it hard (that and the time it’s taken to get where I am), because the stitches themselves aren’t too crazy.  The weirdest stitch so far has been purling 2 through the back loops.  Here’s what I’ve done:

bajada1

Not very impressive yet, as it’s such a small amount of the finished product, but I’m proud of it nonetheless for all the time and effort it is taking.  When it is blocked the lacy edges will appear more obviously, I assume.  There have been a couple of scary points where I’ve had less stitches after a row than I should, and having to go back to fix it is terrifying — I’m not at all sure that I’m undoing some of the stitches properly!  Looks OK so far, though.

Well, that’s all for today.  Thanks so much for stopping by!