CAL: week 6

How did everyone like the chevrons last week?  Everyone’s blankets are looking fantastic — I’m so excited to see this project really taking shape!  Are you ready for this week?  We’re just repeating what we’ve already done now, so any frustrating bits are hopefully over and done with!

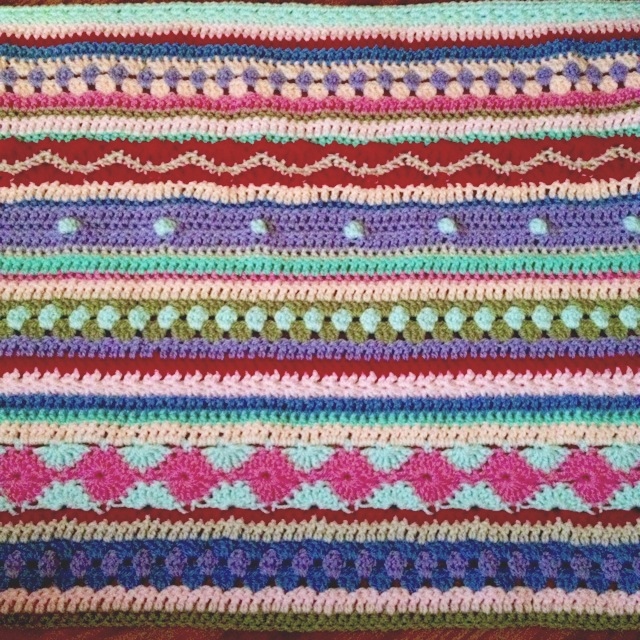
This week we’ll be doing 9 rows, just because I didn’t want to end the week in the middle of a stitch pattern.  Next week we’ll be back to 8.  Don’t forget we’re using US terms!

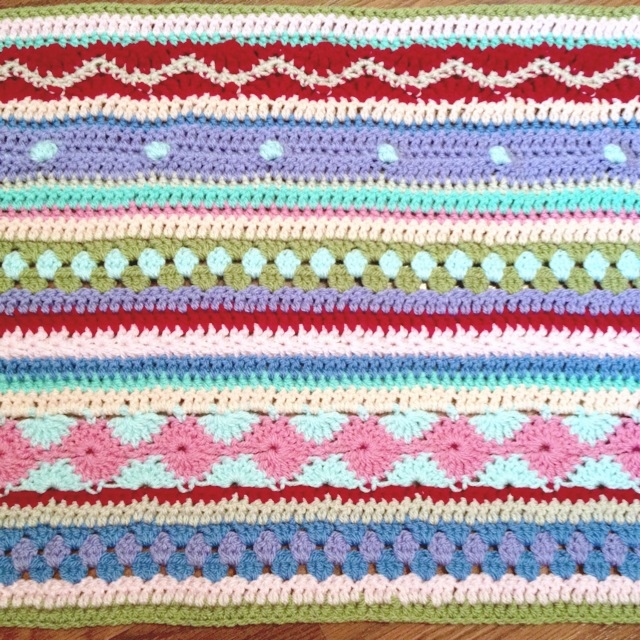
Last week we left off after finishing row 37:
cal79

row 38

With new color, dc across.

rows 39 – 41

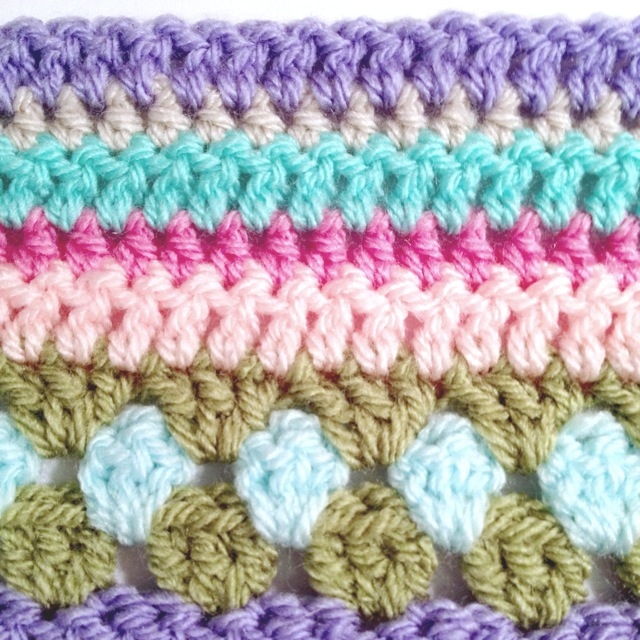
With new colors, work these three rows in the granny stripe pattern.

row 42

With new color, dc across.

row 43

With new color, hdc across.

row 44

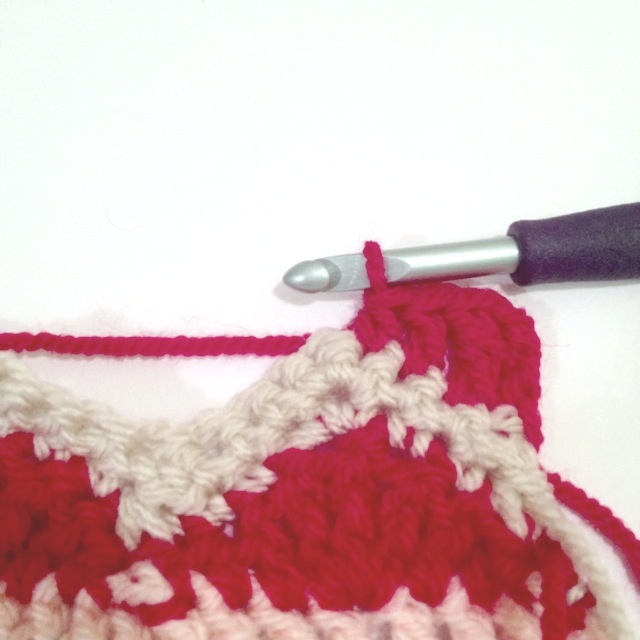
With new color, dc across.  Here’s a picture of the back of the blanket (don’t know why I didn’t get the front):

cal80

rows 45 and 46

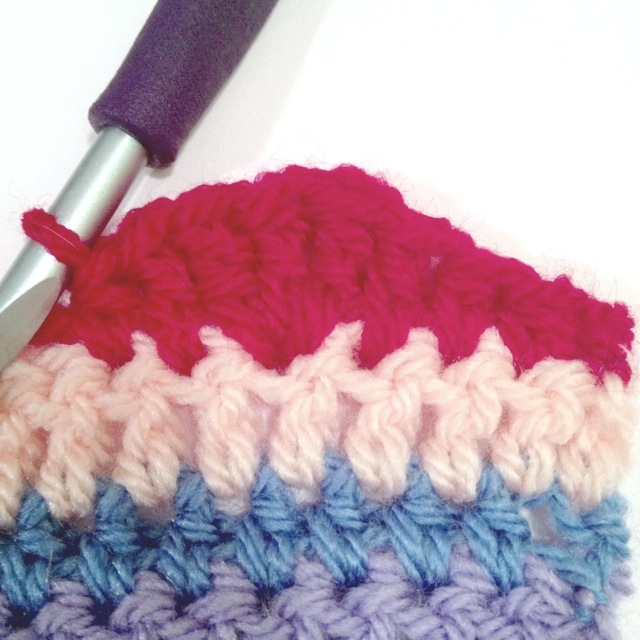
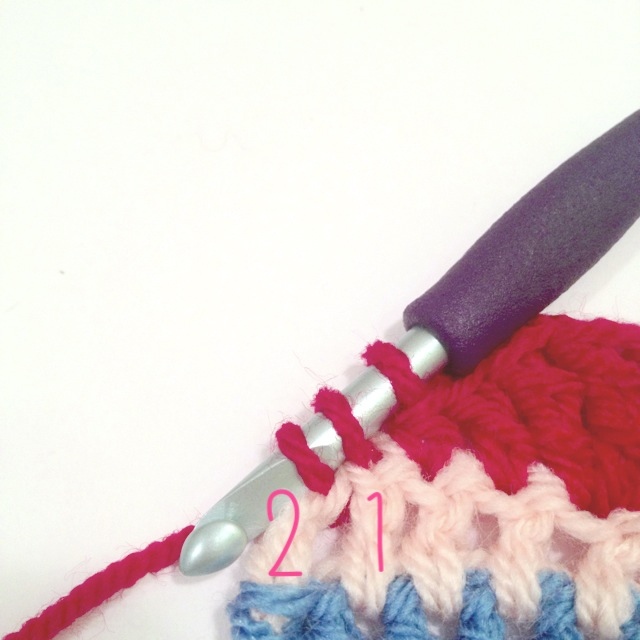
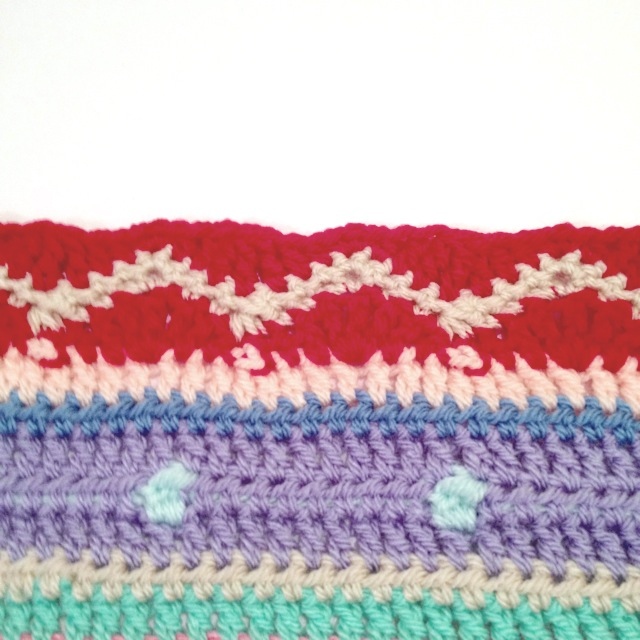
Make sure row 45 is a right side row.  Do the star stitch the same way you did it before:

cal81

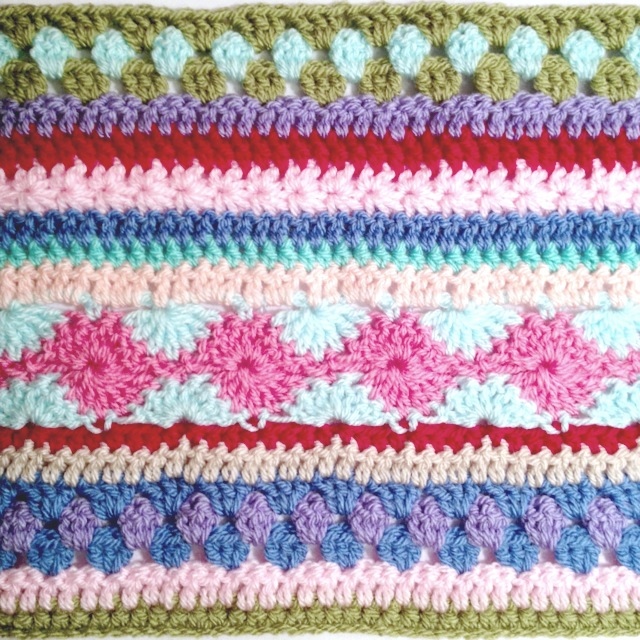
And that’s it for this week!

cal82

Hope everyone is enjoying the CAL so far.  Don’t forget to share pictures of your progress on the facebook page or the Ravelry group, and also on Instagram with the hashtag #nyaccal as well.

Thanks so much for stopping by!

the many moods of knitting

It’s been a while since there’s been a post about knitting, probably because there hasn’t been much knitting done around here lately (largely because of the CAL).  When I get the urge to pick up the needles, however, the actual process of knitting and the feelings I get from it usually matter more than the finished product.  Here’s what I reach for and why.

straight needles

straights


These are grabbed when I want to work with something that looks pretty, but is knitting at it’s most classic. (It’s hard to pass up a pretty pair in the store, even if I’ve already got 5 of the same size.)   They are pretty portable and easy to work with, and there’s just something about that back and forth, back and forth repetition of motion that is so soothing.

circulars or DPNs

dpns


These really do make you look fancy when you knit in public — people can’t believe that you can work magic with so many tiny sticks or those large twisty loops!  They’re a step up in complication from straight needles because they take some finagling, but still easy enough to manage without too much trouble.  Just make sure your project is securely on your needles before putting it back in your bag.

something garter or stockinette

garter


Simple garter or stockinette projects are a great stress reliever because I can just let my hands do their thing and release all that anxiety.  The repetitive, almost mindless quality of projects like this make them perfect for working on while doing other things at the same time, such as watching TV, having a conversation, or listening to lectures.  It’s so easy to put these down and pick them up because you don’t have to follow a complicated pattern, making these projects ideal for a quick 5 minute knitting session on the go.  They work great with textured or novelty yarns, too!

something with lace, cables, or colorwork

lace and cables


These projects require concentration but I always get a sense of great accomplishment when it turns out right!  It’s a proud feeling you get when you can say “why yes, I made it myself!”  They can also be incredibly frustrating, at least for me, because I don’t know how to go back multiple rows when working with lace or cables; this means that if I make a huge mistake, I have to start over.  Small mistakes tend to get left there in hopes that nobody will notice.

a small project

small project


Small projects are ideal for trying out a new technique because if I mess up, I haven’t wasted a zillion hours on something I just have to unravel.  I also reach for a small project when I want to see “fast” results (“fast” is in quotation marks because it is only fast compared to larger knitted projects; a crocheted project of the same size would be much faster).  Also of course they’re quite portable!

a big project

large project


I haven’t been brave enough to take on a knitting project bigger than a cardigan, because that’s big for me!  I know there will be a great feeling of accomplishment when I finish my first cardigan, but it does get a bit monotonous when using a thin yarn and small needles (making it take a long time to see progress).  Also, picking such a big project in stockinette can be a bit dull.  To be honest, I’d choose crochet for the biggest projects like blankets or rugs because they would take less time and you can see fast results, and therefore I’d be less likely to get bored.  When working on large projects, there tends to be a bunch of smaller projects littering my coffee table at the same time that I can grab when taking a “break” from the big item.

So, does any of this ring true for you as well, or do you feel differently?  Do any specific projects, techniques, or tools evoke strong feelings (good or bad) for you?  I’d love to hear about your knitting moods, too!

As always, thanks for stopping by!
CAL: week 5

I hope everyone enjoyed the break in difficulty we had last week — those bobbles weren’t too bad, were they?  This week we’re doing a bit of a chevron/ripple that I’m calling the “mirrored chevron,” so let’s get started!  Don’t forget, we’re using US terms.

Last week, we finished with row 29:

cal57

row 30

With new color, dc across

row 31

For this row and the 3 following rows, the turning chains do NOT count as the first stitch as they have previously been doing.

Change to a color you have a lot of.  Ch 1.  In the first stitch, bring up a loop.  Bring up a loop in the second stitch as well:

cal58

Yarn over and draw through all 3 loops on hook:

cal59

That counts as our first stitch.  It’s essentially my way of making sc decreases without just skipping a stitch entirely, as some books and patterns recommend.  In the next st, make a hdc.  In the next st, make a dc.  In the next st, make 3 tr.  In the next st, make 1 dc.  In the next st, make 1 hdc:

cal60

We’ve made a “mountain!”  Now it’s time to decrease again, only this time we’re going to pull up loops from the next 3 stitches, not 2; yarn over and pull through to finish the st:

cal61

In next st, make a hdc (the start of another “mountain”)… Continue this way, making the mountains and decreasing, until the end.  It should look like this:

cal62

At the end of the row, you should just have 2 stitches left to work into for your last decrease instead of 3.  We’ll do the same as we did in the beginning and pull up loops from the 2 stitches, preparing the decrease:

cal63

row 32

With your next color, finish the decrease of row 31.  Ch 1 (again, this does NOT count as your first stitch like it usually does).  This row is the same process as row 31 only we’re just using sc.  Pull up loops from the first 2 sts:

cal64

Yarn over and finish the stitch:

cal65

Sc in next 2 sts, then sc 3 in the middle treble of the row below:

cal66

Sc in next 2 sts, then make another decrease over the next 3 sts, just like we did in the last row:

cal67

Continue this until the end.  It should look like this:

cal68

At the end, you will only have 2 sts, left, so do like we did in the last row: pull up loops from last 2 sts, yo, pull through to finish st.  Yes, go ahead and finish the stitch.  We’re not changing colors yet!

row 33

With the same color, repeat row 32, but do not finish the last decrease stitch because we will change colors now:

cal70

row 34

With the same color as row 31, ch 3.  This does not count as your first stitch!  Make a tr into the second st.  That counts as your first stitch.  dc in the next st, hdc in the next one:

cal72

sc 3 in next st, hdc in next st, dc in next st:

cal73

Now we’re going to decrease over the next 3 stitches.  Make a treble into each of the 3 stitches but do not pull the last loop through any of them.  When you’ve done that, yarn over and pull through all loops on your hook and it’s a treble decrease:

cal74

You’ve got it now; continue until the end.  It will look like this:

cal75

At the end, there are only 2 sts left so we will just decrease with 2 unfinished trebles.  Do not finish, we’re changing colors:

cal76

row 35

This is a normal row of hdc, so ch 2.  This does count as your first stitch again, so make your first hdc in the top of the dc in the row below:

cal77

At the end, remember that the ch 3 of the row below didn’t count as a stitch, so make your last hdc in the top of the treble (but don’t finish, we’ll change colors):

cal78

I’d check to make sure you have the correct stitch count at this point.  Should be the same number you started the blanket with.

row 36

Make a normal dc row.

row 37

Make a normal hdc row.

cal79

We’re done for this week!  I had to take this last picture on the floor because the whole thing no longer fit on my white paper, which is what I’ve been using for all the close up pictures.

Also, we’ve now completed all of the stitch patterns we will use in this blanket!  I was considering doing surface chains but I figured we’ve got enough eye-catching stuff going on as it is.  Feel free to add them if you like, though, if you’re looking for a little extra something!  Just make sure you do them on the front of the work.  These might be good for any scraps we have at the end.

Anyway, as usual, if you have questions, don’t be afraid to ask!  And again, I look forward to seeing your pictures on facebook and Ravelry and Instagram (#nyaccal)!  Everyone’s doing a fantastic job so far and I love seeing all the color variations/palettes everyone’s got going!  I’m having a blast and I hope you are too!

Thanks for stopping by!

my temp job on a food truck

A few posts ago I mentioned that I’ve started working on an as-needed basis on a food truck called The Herban Legend, and I wanted to share a bit about it with you.  It’s so fun, and I wish I could just keep doing that for a while (but I need a job that will have more hours and thus, more money).  I’m actually really proud of the business, the chef I work with (my chef boyfriend’s head chef’s girlfriend… so many chefs!), and myself — I’m learning quickly and doing my best!  Here are some pictures:

the herban legend


You order at the window, and inside there’s a fryer, a flat top grill, some warmers, a refrigerator for the fresh ingredients, a freezer, a cooler for the drinks, a sink, and the little area in front of the window that has a table/cutting board.  That’s a lot in such a small space!  I stand at the window and take orders using both regular paper tickets and an iPad app that’s like a cash register.  The chef’s phone has an attachment that works with the same register app, and it lets you swipe credit/debit cards.  Pretty cool, right?  I also season the fries, put things in the little baskets and paper bags, and call out the names of the customers to give them their orders.  I’m learning what goes into each dish, so maybe I’ll be able to construct them myself sometimes when we get really busy!

The menu is designed with a few staple items and some specials that can change from day to day, depending on what ingredients are available and what new ideas the chefs have.  Here’s what we were serving on Wednesday:

the herban legend menu


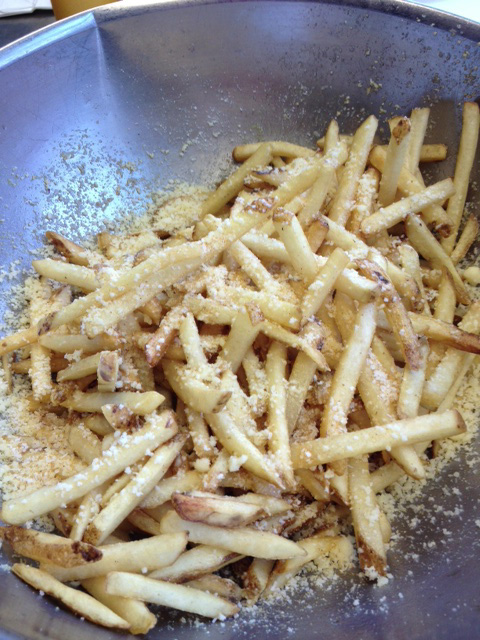
I’ve tried almost everything and it’s all amazing!  The Parmesan truffle fries are especially great — they’re tossed with Parmesan, truffle oil, and a salt blend:

the herban legend parmesan truffle fries


There are always some left over at the end of the day, so I get to eat them along with a free meal of my choice!  It’s really a great job, I just wish I could work more days/hours!

Just wanted to share this with you.  I know it’s not crochet/knitting related but it’s something I’m really excited about, and I don’t go off-topic too often, right? 🙂

Anyway, thanks for stopping by!  Back to the CAL tomorrow — it’s gonna be a great installment!

CAL: week 4

Everyone’s blankets are looking fantastic!  I’m so excited that so many people are taking part — there’s even a group in South Africa working on it!  I hope all of the rows so far have been do-able.  This week is going to be a bit of a break from the difficult stitches, although there is still a “special” stitch!  Ready to get started?

Don’t forget, we’re using US terms!

Last week, we finished here, with row 21:

cal50


row 22

With new color, dc across.

row 23

With new color, hdc across.

row 24

With new color, dc across.

row 25

With new color, hdc across.

row 26

We’re going to do 3 rows of 1 color, so I’d recommend starting this row with a color of yarn you have a lot of.  With your chosen new color, dc across.  I’m using my lavender color for this:

cal51


row 27

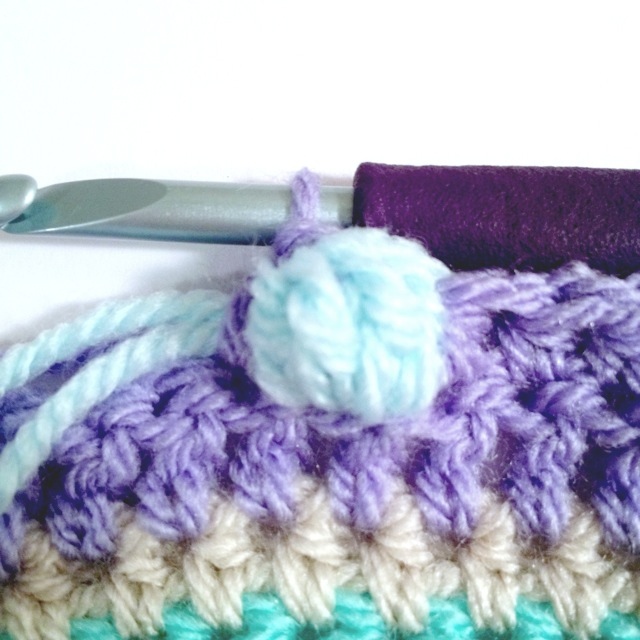
Do not change colors.  This is a row of hdc with bobbles interspaced.  You can space your bobbles however you like, but I’m personally putting 9 hdc stitches in between each bobble.  The bobbles will be a different color, so pick one that goes with your current working yarn.  If you want to space your bobbles like mine, here’s what to do.

ch 2, hdc 8 across.  Leave last stitch unfinished:

cal52


Finish the stitch with your bobble color.  Crocheting over the working yarn of your background color, make 1 dc in next st, but do not pull the last loop through:

cal53


Make 3 more unfinished dc stitches in the same stitch.  You will have 5 loops on your hook:

cal54


Switch to your background color and pull it through all 5 loops of your bobble stitch.  Make a hdc in the next stitch:

cal55


Working over your bobble yarn, make 8 more hdcs, leaving the last unfinished.  Repeat the bobble.  Keep doing this until the end!  You will not have 9 stitches of background color at the end (I have 7) but that’s OK — it looks fine, right?

row 28

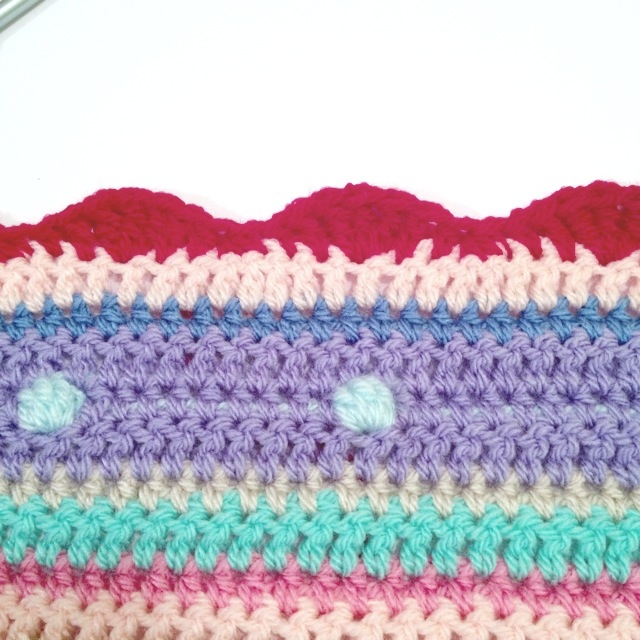
With the same background color, dc across.  That completes the bobble section!  Aren’t they cute?

cal56

row 29

With new color, hdc across:

cal57


That’s all for this week!  Pretty simple compared to the star stitch and the Catharine wheels, no?  Next week we’ll have yet another challenge, but soon we’ll be repeating the stitches we’ve used already and you’ll have all of them down!

Don’t forget, you can post photos of your progress on the facebook page or on the Ravelry group.  If you’re on Instagram you can use the hashtag #nyaccal to share your progress!

As always, thanks for stopping by!