CAL: week 17

Hello everyone!  Are you ready for week 17?  It doesn’t seem like it’s been that long, but it’s been long enough for my blanket to reach it’s intended size (actually it’s bigger than I’d intended).  It covers the top of a double bed and is completely square after finishing this week’s rows.  Definitely a large throw.  This means that I am finished with my blanket, excepting the border, which will have a post all it’s own very shortly for those who want instructions.  If your blanket is not the size you wish it to be at this point, by all means carry on.  At the end of this post there will be some suggestions for you that you can choose to follow if you like.

Well, let’s get started, remembering that we’re using US terms.  Last week we finished row 124:
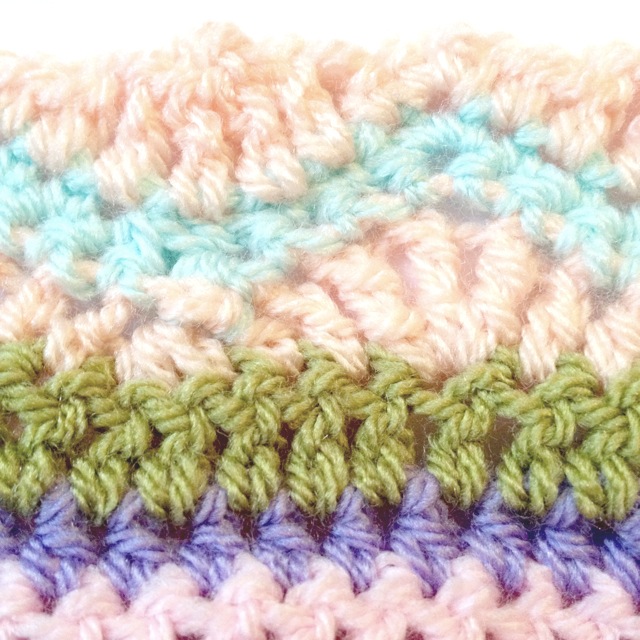
cal102

row 125

With new color, hdc across.

row 126

With new color, dc across.

rows 127-129

With new colors, work the granny stripe pattern (original instructions here).

row 130

With new color, dc across.

row 131

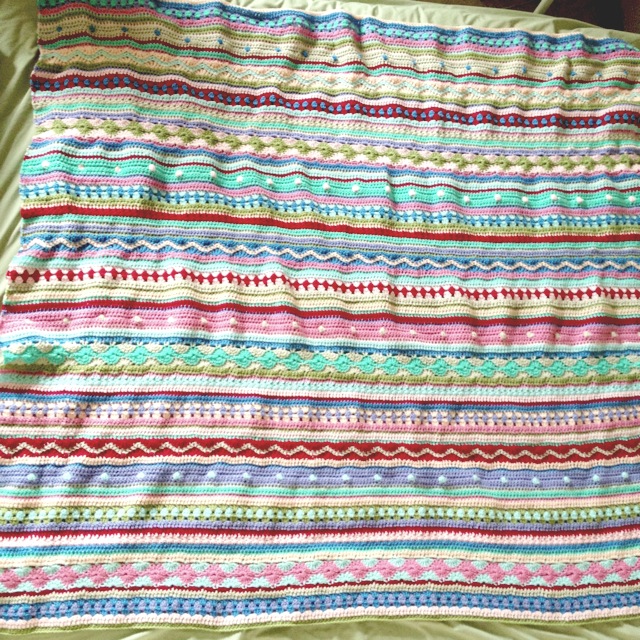
With new color, hdc across.  Fasten off (if you are done with your blanket) and weave in your ends!

cal103

Ta-da!

cal104

notes for those who wish to continue with their blankets

1. This last installment has 7 rows instead of 8, so be conscious of your right and wrong sides as you continue.

2. The way I chose the order of the stitch patterns was pretty random except for the bobble rows.  I tried to evenly space the bobble rows from each other, hoping that evenly spaced big bands of color would tie the whole thing together nicely.

3. If you would like to follow a specific pattern, I’d recommend going back, working row 8, and continuing from there.  That would be the first Catharine wheel row.  That should keep the bobble rows evenly spaced and will also keep your right and wrong sides correct.

about the next CAL post

There will be one last post about the border in a few days.  You can choose not to do a border at all, you can follow the instructions that I will have available for you, or you can choose to do your border completely differently than mine.  In whatever case, there will be some recommendations for border construction and pictures of my own border in the upcoming post, as well as my thanks, some extra CAL tidbits, and a question I will have for all of you.
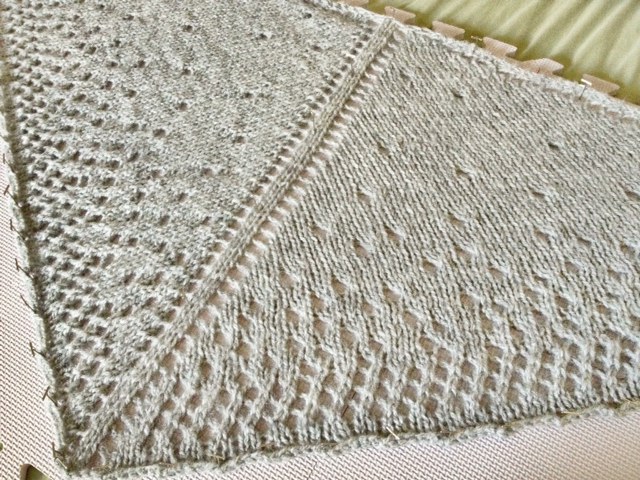
credit

Let’s take a look back at our inspiration.  The lovely blanket was made by Julie at Little Woolie, and I must say that I’m a bit embarrassed that my blanket came out so close to hers; despite some efforts I made at the beginning to make them different, they do look so alike, particularly at first glance.  I’m much relieved to say that she is OK with it all, because I did have some pangs of guilt there at the end.  However I’m very happy with my blanket and I really do mean this as a credit to Julie’s lovely work — she is an inspiration in many ways!  Please, however, if you pin that last picture to Pinterest be aware that it is not my blanket or picture and that credit should therefore not be given to me.  If you wish to pin her picture, please go here and do it from her page so that she can get the credit that she deserves.  I’ll appreciate it, and she will too!

a project for a friend

My friend Tara, for whom I made this hat, met me for lunch the other day at a cafe near the local yarn shop.  She went with me after we ate to just browse through the yarn, and ended up purchasing some yarn and a pattern booklet for me to make her a second item!  The yarn is K’acha from Mirasol Yarn (of merino, alpaca, and silk) in shade 1201:

yarn for tara

What a lovely color for fall!  The yarn is listed on Ravelry as being DK weight but it seems more like a heavy worsted as I’m working.  Anyway, Tara bought 4 skeins to be sure there was enough for the whole project.

The shawl/scarf is called “bajada,” it is knit on size 8 straight needles, and is more crescent shaped than triangle shaped.

I would like a similarly shaped shawl/scarf myself, but I don’t think it’ll be another one of these — this pattern is so hard!  You have to have your eyes glued to the booklet instructions — every row of small print contains a different combination of “stitch pattern A” and “stitch pattern B” so you have to pay careful attention!  In fact, I couldn’t keep track of it all in my head so I wrote out the combinations for each row (as well as reminders to increase every 4th row) on notebook paper and am checking them off as I go.  I think that’s what makes it hard (that and the time it’s taken to get where I am), because the stitches themselves aren’t too crazy.  The weirdest stitch so far has been purling 2 through the back loops.  Here’s what I’ve done:

bajada1

Not very impressive yet, as it’s such a small amount of the finished product, but I’m proud of it nonetheless for all the time and effort it is taking.  When it is blocked the lacy edges will appear more obviously, I assume.  There have been a couple of scary points where I’ve had less stitches after a row than I should, and having to go back to fix it is terrifying — I’m not at all sure that I’m undoing some of the stitches properly!  Looks OK so far, though.

Well, that’s all for today.  Thanks so much for stopping by!

CAL: week 16

Hello everyone!  This week we’re back to 8 rows — are you ready?  We’re using US terms, and last week we finished row 116:

cal100

row 117

With new color, hdc across.

row 118

With new color, dc across.

row 119

With new color, hdc across.

rows 120-122

With 2 colors, repeat the bobble rows (original instructions here).

row 123

With new color, hdc across.

row 124

With new color, dc across.  Here’s a picture of this week’s rows:

cal102

That’s all for this week.  Keep the pictures on facebook coming — it’s great to see what everyone is doing!

finished a fun shawl!

A little over a week ago I posted some pictures of projects on Ravelry that I would like to knit.  Well, I made one!  It’s the lace mess shawl.

lace mess shawl 2

This is actually the first time I’ve ever blocked anything.  Ever.  I’ve had the blocking mats and pins (from KnitPicks) for a while now, but have never needed to use them.  With this project, it specifically calls for blocking, and since I intend to sell it, I figured it would be a good idea.  Being inexperienced in blocking, I am of the hope that misting the shawl with a spray bottle of water will be good enough — I didn’t want to soak it and roll it in a towel because I don’t have any clean towels (I need to go to the laundromat… ugh).  Do you think misting it with water will suffice?  We’ll see soon enough, but I’d rather not have to do it twice.

lace mess shawl 1

There’s not a row by row pattern — the instructions just tell you how to make the bare bones of the shawl and it lets you put in the holes at your discretion.  It was neat not having to follow a pattern, but because of this I did end up making the shawl rather larger than the original appears to be on the pattern’s Ravelry page.  Not that that’s a problem.  It was a fun pattern, and quick too, because it called for bulky yarn and very large needles.  I would certainly not mind making another of these.

think the yarn used is Lion Brand Jiffy, but it had been sitting in my stash bin for a long time without labels so I’m not positive.

I almost forgot — the edging has little picots where the pins are, made by implementing the knitted cast on, which I’d never attempted before.  They don’t look like very distinctive picots on my shawl, whereas pictures of other people’s shawls on Ravelry do seem to have more pronounced picots.  The instructions in the pattern seemed detailed enough, and I double checked with a video on YouTube to be sure I was doing it right, and I think I was, but they still look almost nonexistent.  Any ideas on why this might be?

Thanks for stopping by, and please leave your opinion on using a spray bottle for blocking and the proper method to make picots with the knitted cast on!  Thanks so much!

new KnitPicks items

I took advantage of the sale KnitPicks had last week, offering a free skein of their new Wool of the Andes Superwash with any order.  I got the bluish-grey shade, Cadet:

knitpicks wool of the andes superwash in cadet

At $3.49 per 50g/110yd, I’m not sure I’d actually purchase this.  I suppose it’s still a good deal for superwash wool… what do you think?  Well, it’s still 100% wool and thus not the softest yarn I’ve used.  Not sure I’d want this as a hat or scarf.  I don’t really know what to do with this single skein; any suggestions?  Since it was free, I can’t complain.

The items that I ordered so that I could get the free yarn are ones that I think will be very useful:

knitpicks new tools

I do love KnitPicks’ needles, and I didn’t have any that were 16″.  The 16″ needles are my favorite way to make hats, and 7 is a common size.  It’s too bad that the 16″ cables aren’t available for the interchangeable set that I have, but it is what it is.  It’s worth purchasing the 16″ needles, I think.  The coiled wire thing next to the needles in the image above is a wire yarn stranding guide, supposed to be handy for colorwork.  Unfortunately it is too big to fit on my finger the way it does on the hand model in the picture on their site, but if I slide it further down my finger it will be fine.  I’ll just have to adjust my knitting angles, I suppose, because I do intend to use it.

That’s all for today, I suppose.  Nothing too exciting.  Well, thanks for stopping by!