Almost done! Just the border to go! Sandra over at Cherry Heart did a lovely border, so I decided to use that pattern as well (only I added an extra row of sc to add just a tad more width).
But before the pretty ruffle-y, wavy edge, there’s a technique I wanted to share with you that I used. It’s from Felted Button, and it tells you how to crochet a clean edge along a rough edge (aka the sides of a blanket made with rows).
Click the link for the full tutorial, but I’ll tell you that you use your border color to do a preliminary row of slip stitches along the sides of your work, and then when you start your proper border you work into those slip stitches. Here’s the front:

It looks that way all the way around, just normal sc. But check out the back view, on the sides of the blanket:
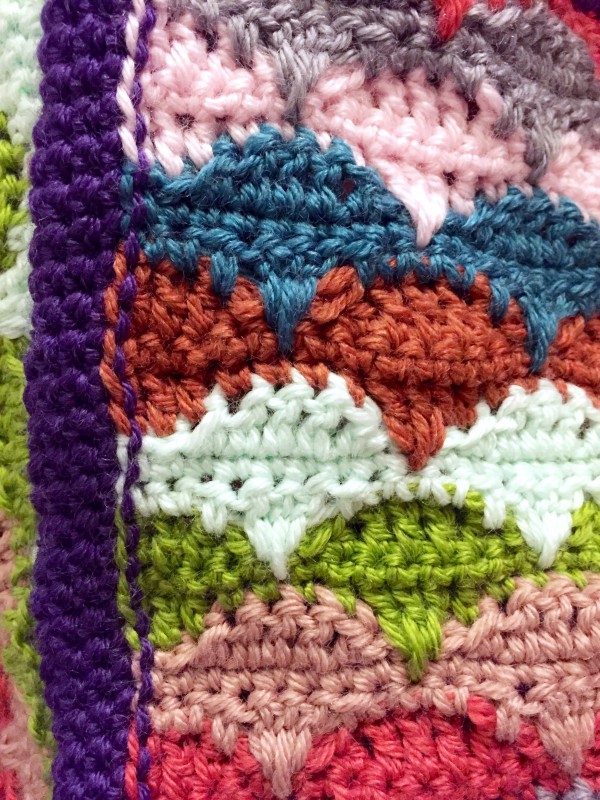
You can see the “dotted line” of the slip stitches, but it looks better, in my opinion, than the rugged “v” shapes you get when you don’t do the preliminary slip stitches.
Well, that’s all for now. I’ll have the rest of the border and completed blanket photos up soon! Thanks for stopping by!


You are doing an incredible job! So VERY PRETTY! I can hardly wait to see the finished project!
LikeLike
Thank you so much! This really was a fun project and I’m very pleased with the pattern!
LikeLiked by 1 person
I wish I had seen this before I finished the border on my current blanket, it’s so neat! Thanks for sharing.
LikeLike