I hope everyone enjoyed the break in difficulty we had last week — those bobbles weren’t too bad, were they? This week we’re doing a bit of a chevron/ripple that I’m calling the “mirrored chevron,” so let’s get started! Don’t forget, we’re using US terms.
Last week, we finished with row 29:

row 30
With new color, dc across
row 31
For this row and the 3 following rows, the turning chains do NOT count as the first stitch as they have previously been doing.
Change to a color you have a lot of. Ch 1. In the first stitch, bring up a loop. Bring up a loop in the second stitch as well:
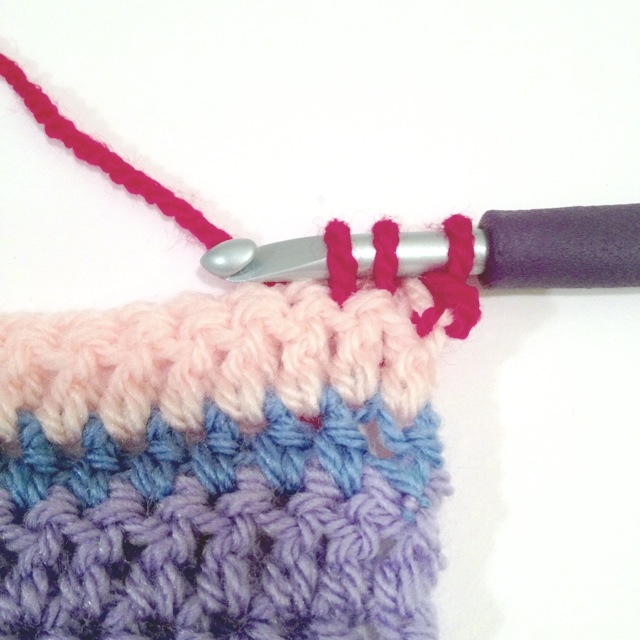
Yarn over and draw through all 3 loops on hook:

That counts as our first stitch. It’s essentially my way of making sc decreases without just skipping a stitch entirely, as some books and patterns recommend. In the next st, make a hdc. In the next st, make a dc. In the next st, make 3 tr. In the next st, make 1 dc. In the next st, make 1 hdc:

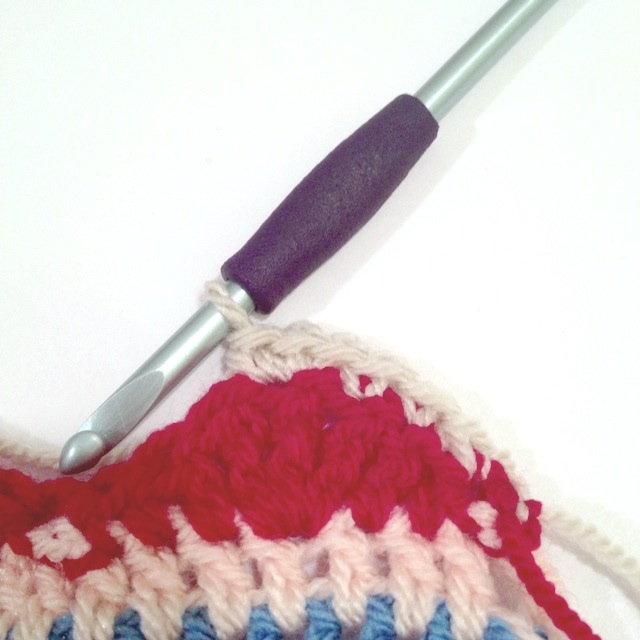
We’ve made a “mountain!” Now it’s time to decrease again, only this time we’re going to pull up loops from the next 3 stitches, not 2; yarn over and pull through to finish the st:
In next st, make a hdc (the start of another “mountain”)… Continue this way, making the mountains and decreasing, until the end. It should look like this:

At the end of the row, you should just have 2 stitches left to work into for your last decrease instead of 3. We’ll do the same as we did in the beginning and pull up loops from the 2 stitches, preparing the decrease:
row 32
With your next color, finish the decrease of row 31. Ch 1 (again, this does NOT count as your first stitch like it usually does). This row is the same process as row 31 only we’re just using sc. Pull up loops from the first 2 sts:

Yarn over and finish the stitch:
Sc in next 2 sts, then sc 3 in the middle treble of the row below:
Sc in next 2 sts, then make another decrease over the next 3 sts, just like we did in the last row:

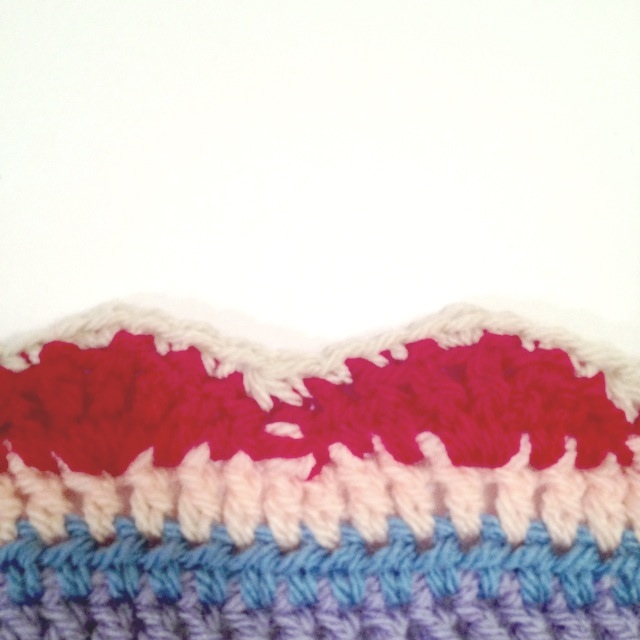
Continue this until the end. It should look like this:
At the end, you will only have 2 sts, left, so do like we did in the last row: pull up loops from last 2 sts, yo, pull through to finish st. Yes, go ahead and finish the stitch. We’re not changing colors yet!
row 33
With the same color, repeat row 32, but do not finish the last decrease stitch because we will change colors now:

row 34
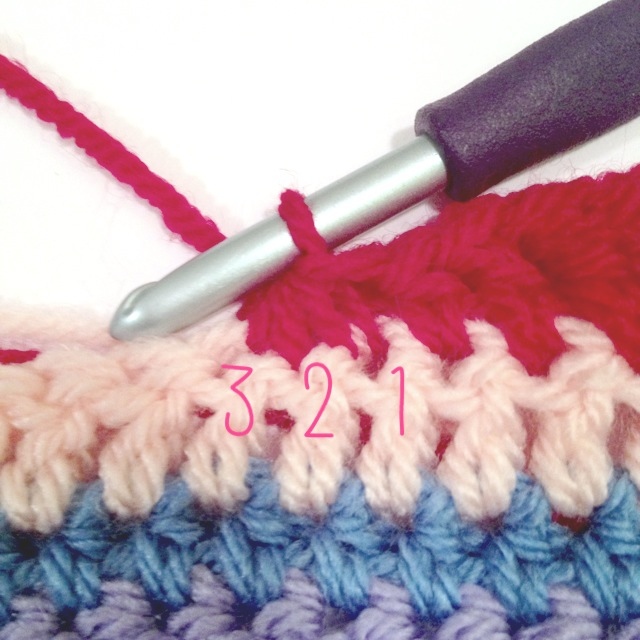
With the same color as row 31, ch 3. This does not count as your first stitch! Make a tr into the second st. That counts as your first stitch. dc in the next st, hdc in the next one:

sc 3 in next st, hdc in next st, dc in next st:

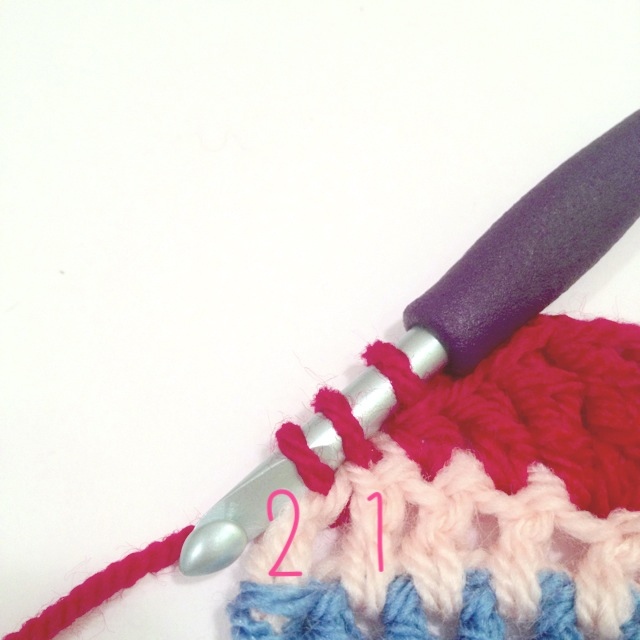
Now we’re going to decrease over the next 3 stitches. Make a treble into each of the 3 stitches but do not pull the last loop through any of them. When you’ve done that, yarn over and pull through all loops on your hook and it’s a treble decrease:

You’ve got it now; continue until the end. It will look like this:

At the end, there are only 2 sts left so we will just decrease with 2 unfinished trebles. Do not finish, we’re changing colors:

row 35
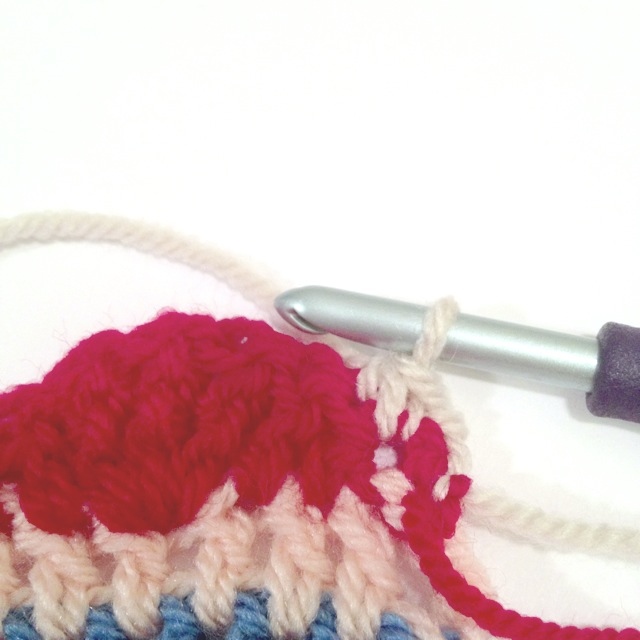
This is a normal row of hdc, so ch 2. This does count as your first stitch again, so make your first hdc in the top of the dc in the row below:

At the end, remember that the ch 3 of the row below didn’t count as a stitch, so make your last hdc in the top of the treble (but don’t finish, we’ll change colors):

I’d check to make sure you have the correct stitch count at this point. Should be the same number you started the blanket with.
row 36
Make a normal dc row.
row 37
Make a normal hdc row.

We’re done for this week! I had to take this last picture on the floor because the whole thing no longer fit on my white paper, which is what I’ve been using for all the close up pictures.
Also, we’ve now completed all of the stitch patterns we will use in this blanket! I was considering doing surface chains but I figured we’ve got enough eye-catching stuff going on as it is. Feel free to add them if you like, though, if you’re looking for a little extra something! Just make sure you do them on the front of the work. These might be good for any scraps we have at the end.
Anyway, as usual, if you have questions, don’t be afraid to ask! And again, I look forward to seeing your pictures on facebook and Ravelry and Instagram (#nyaccal)! Everyone’s doing a fantastic job so far and I love seeing all the color variations/palettes everyone’s got going! I’m having a blast and I hope you are too!
Thanks for stopping by!


Love the ripple! Again something I’ve not done before.;)
LikeLike
It’s looking great, really unusual!
LikeLike
Yay! Week 5 is here! 😀 Thankyou, it’s looking gorgeous ~ will get started this minute x
LikeLike
Love this ! How did I miss it before? Off to catch up on your previous posts……..
LikeLike
I’ve been doing that too, only found them last week so have been crocheting like crazy to join in the crocheting of this beautiful blanket! 🙂
LikeLike
Great! I’m glad you’re on board too! Can’t wait to see what you make! 🙂
LikeLike
What a GREAT instruction! (I found it a little difficult to see the stitches in fuchsia color though.)
LikeLike
Thanks! Yes, it was hard to get that color to show up right in the pictures — it’s still not right but I’m not sure how to fix it. I’m sure there’s a way to edit the saturation of one color in Photoshop or something but I have no idea how to do it. 🙂
LikeLike
I know you’ve said we’re done with different stitches but looking at those hearts (http://bit.ly/11ZMVsF) I wonder if you would make an exception 🙂
Looking forward to Saturday!
LikeLike
That pattern is super cute! I don’t know if the math would work out — I’d have to sit down and make a swatch because I can’t quite picture the stitch counts in my head. The pictures of it on Ravelry *look* like the stitch pattern would require a multiple of 7 plus 2 total stitches, which wouldn’t match our 24 plus 1. I’m also a few weeks ahead of everyone — it takes a while to put the tutorials together (what with the pictures, troubleshooting and getting everything to make sense) so I got ahead to make sure I wouldn’t get behind, lol. It might look odd to introduce another stitch at the point I’m at now. That’s not to say that you can’t give it a shot, though — I’d love to see if it would work, and your blanket would be especially unique! 🙂
LikeLike
I’ll try to figure it out. If not we might do another CAL one day, right? Have a great day and thanks again for all the work you put into this!!
LikeLike
You’re right. It would work but each of us would have to do her (or his) own maths. And maybe that isn’t a good idea after all. Thanks for giving it some thought though. I will surely try to make that “unique” blanket with the colorful (acrylic) one.
LikeLike
I had problems in the number of stitchs of the decreasing row of the “mountains”. Always had more stitches, 2 or 3… I done these stitches together to reduce their quantity.
I hope the total amount of the stitches of my blanket still ok.
LikeLike
If you can get it back to the original number, that would be best. It doesn’t have to be fixed in that row though. You could just add some decreases in a row of plain double crochet. Feel free to improvise! 🙂
LikeLike
Yes! I’ll do this! Thank you.
LikeLike
I started when you guys were already done week three, and I’ve been crocheting like mad to catch up! Finally, today was the day 🙂
Now to weave in my ends in preparation of tomorrow’s new week of work.
I am having so much fun with this CAL! I am not very experienced at crochet (I’m more of a knitter) so this blanket is really challenging — yet your directions are so wonderful and clear that I’m not frustrated at all. Thank you!!!
LikeLike
That’s awesome! I’m glad you joined and I’m very pleased that you found the directions easy to understand (I spent a lot of time trying to make it that way so it’s good to know it worked)! Good job catching up!
LikeLike
So is that the end of the tutorial? I now need to download the entire pattern (without comments, etc) which I assume is posted in reverse …?.
LikeLike
Nope! I’ll keep posting every Saturday until my blanket is done, and then those who want to add more can improvise. Since we’ve done all the stitch patterns though, you could just wing it from here if you’d like! I won’t put it all together in one page until the end because I feel like having multiple copies of the pattern up would cause some confusion. 🙂
LikeLike
Thanks for your reply and explanation of what happens next. In the meantime I’ll keep on checking back …. and thank you so much for this brilliant CAL
LikeLike
No problem! I’m really glad you’re enjoying it!
LikeLike
I just can say I love it and I’d want to learn how to do all this wonders!!!!!!!! Bellísimo
LikeLike
Thank you so much! You can do it! 🙂
LikeLike